How to Install Drywall: Gyprock
To know how to install drywall in a kit home yourself is a great skill, but DIY plastering is well within the reach of the handy person. The recent proliferation of drywall tools gives us novices a head start and a great finish.
Drywall panels are also known as gypsum board, gyprock, wallboard, plasterboard, gibraltar board, gib wall, ceiling linings, rock lath and sheetroc.
For this page I use the term drywall. It is the US term used for a common method of constructing interior walls and ceilings using panels made of gypsum plaster pressed and dried between two thick sheets of paper. To install drywall in an entire 3 bedroom house will take one or two days by two experienced drywallers, but is now so easy to use and specific tools so prolific, that it can be installed by any amateur kit home builder.
Tools and materials to install drywall
Lets look at a list of drywall tools and equipment that will make this task achievable.
- Drywall screws/nails
- Power screwdriver
- Utility knife
- T-square
- Small rotary cutter
- Stud glue
- Joint/plastering compounds
- Floats and spatulas
- Jointing tape
- Mixing buckets
- Stirrers/attachments
- Sanding gear
- Drywall lift
- Raised planks or stilts
- Cornice cutting boards
- Cornice cement
- Implement washing setup


Types of drywall
Standard core
10mm to 13mm (3/8" to 1/2") thicknesses, with either recessed or square edge profiles
Ceiling spec
10mm (3/8") thick lightweight plasterboard used as a ceiling lining
Wet area
Moisture resistant Wet Area Plasterboard is used for lining of wet areas in bathrooms, shower recesses, laundries and toilets
Wet area Fibre Cement
6.5mm
(1/4") board for lining walls in kitchens, bathrooms, laundries and
other common ‘wet areas’, fibre cement sheet is immune to permanent
water damage and will not rot
Used in partition wall and ceiling systems where specific fire-resistance ratings are required. It contains reinforced glass fibre
Wet area fire stop
developed specifically for use in wet area fire-rated partition
Sound resistant
For use in high-performance acoustic wall and ceiling systems up to 13 mm, high density
6.5mm (1/4") thick plasterboard is used to construct curved walls, arches, ceiling and feature panels
How much does drywall cost?
If your standard board is 10mm (3/8"), then ex factory it will cost between $6-$8 USD per sheet (8x4). In Australia it seems to be more than twice the cost, so $4-$5 per square metre or $20 per sheet or more is close to the mark. If you want it hung and finished put away another 60c to $1 per square foot depending on how complex the job is. That's about $30-$40 per sheet. My 140 sq metre house cost $6k for complete installation (I supplied the linings). Get a few quotes and don't necessarily choose the cheapest and demand a cleanup of the site. Many drywallers will not finish a job where the sheets are already hung. They are a bit precious in this area as they call all others 'cowboys' or will groan about the uneven joints and levels.... So think twice about starting something you may not finish. In reality, these guys are artisans who value true lines and ripple free walls. That is, what you would demand if you paid money for it.
How to install drywall: materials
Jointing Compounds
Gypsum-based setting products designed
for taping and base coating plasterboard joints and angles. These
compounds come in 45 to 90 minute working times
Finishing Compounds
Designed
for use as a finishing coat over taping and base coats. Products are
pre-mixed for immediate use and are designed for hand trowel or machine
application. There are two types, semi-light and heavy-bodied
formulations
Gypsum-based adhesives designed to fix plain and decorative cornices to plasterboard walls and ceilings


All Purpose Compounds
Pre-mixed compounds which can be used
as a three coat wall jointing system with paper tape. Alternatively
they can be used as a second and/or finishing coat over gypsum jointing
compounds
Wet Area Compounds
For jointing and sealing wet area plasterboard usually ready mixed for immediate use
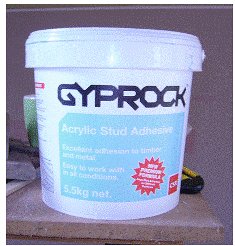
Stud Adhesives
For fast fixing of plasterboard to timber and metal studs
Delivery
When the drywall panels are delivered, have them dropped on the floor inside the house.
They can come in 2.4 x 1.2 m (8 x 4 ft) or larger panels up to 6 metres (20ft) long so if you
want to move them you need two people.
How to install drywall: ceiling battens
 Ceiling battens
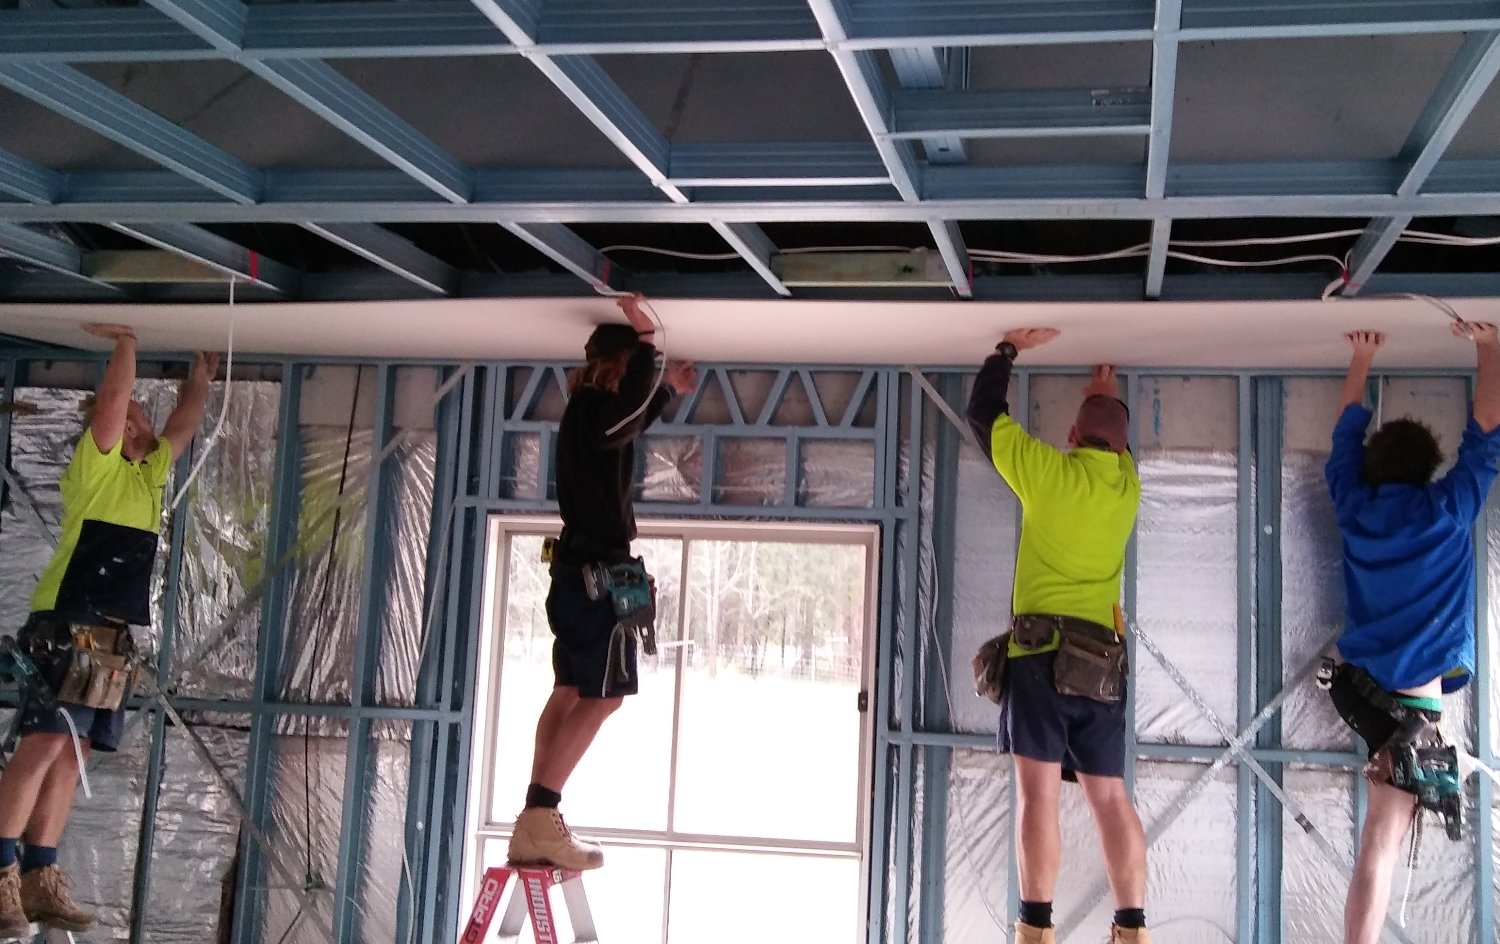
When sheeting up a room, start with the ceiling. Plastering a ceiling requires a lot of preliminary work so let's get started. Most kit homes come with metal ceiling battens as an alternative to wood ceiling joists. They are much easier to install and of course much cheaper when installing drywall ceilings.
First thing to do is establish the lowest point on the trusses in the room, add the depth of the batten and transfer that height to the edges of the room using a chalk stringline. Mark off where the battens will be placed around the wall.
Ceiling batten spacings are usually 450mm (18in). Alter widths to ensure sheets will be adequately supported on the edges. Using wood tech screws and attach the metal battens to the bottom chords of the trusses.
Add packing strips under the battens to level them with the lowest point found earlier and screw home the rest of the battens.
Don't forget before you wall up the interior, get the electrician and the plumber to do their "Rough In" preliminary installations through the exposed framing.
Cutting and lifting sheets
 Gyprock / Drywall lift
Measure and mark, then using a large T-square, score the paper on the front side (usually white) with a utility knife. Break the sheet along the cut with your knee or over a platform edge, then score the paper backing, which will complete the cut.
Small features such as holes for outlets and light switches are measured and cut now using a keyhole saw, a small high-speed bit in a rotary tool or a small hand saw.
One of the most useful tools in drywalling is the drywall lift or drywall hoist. It can be hired or bought and on sold, but for a sole worker it is a must.
To install drywall ceilings without a drywall lift, you can make your own support ...construct a 800 x 800mm (30ins) wood frame to lay on the floor, add an upright T section frame just under the height of the ceiling battens, so it can wedge up one end of the sheet, as you nail up the other end. You can even put casters on the base, with brake stoppers, to easily move and position the ceiling sheets. Or use a few buddies.
 People power sheet lifter
Glueing and screwing
Start in a corner opposite the entry to the house and dab on 'walnut' sized dollops of stud adhesive to the metal ceiling battens. Raise the sheet to the ceiling and position it against the vertical wall studs and across the battens. Using an electric driver, apply screws at 20cm (7-8in) spacings along the battens.
Drywall screw heads have a curved taper allowing them to self-pilot and install rapidly without punching through the paper cover. The driver should screw in the fastener until the surface is dimpled, but not broken. Continue sheeting length-ways to the opposite side and cut the last sheet to fit. Start at that end and work back, so the sheets are staggered.
If the sheet bows in the centre, use 5cm (2in) square drywall offcuts as temporary nail blocks to secure the sheet without nailing through it. Now glue the lower sheet in place. Wedge up if necessary to just touch the top sheet, make sure it is level then fasten.
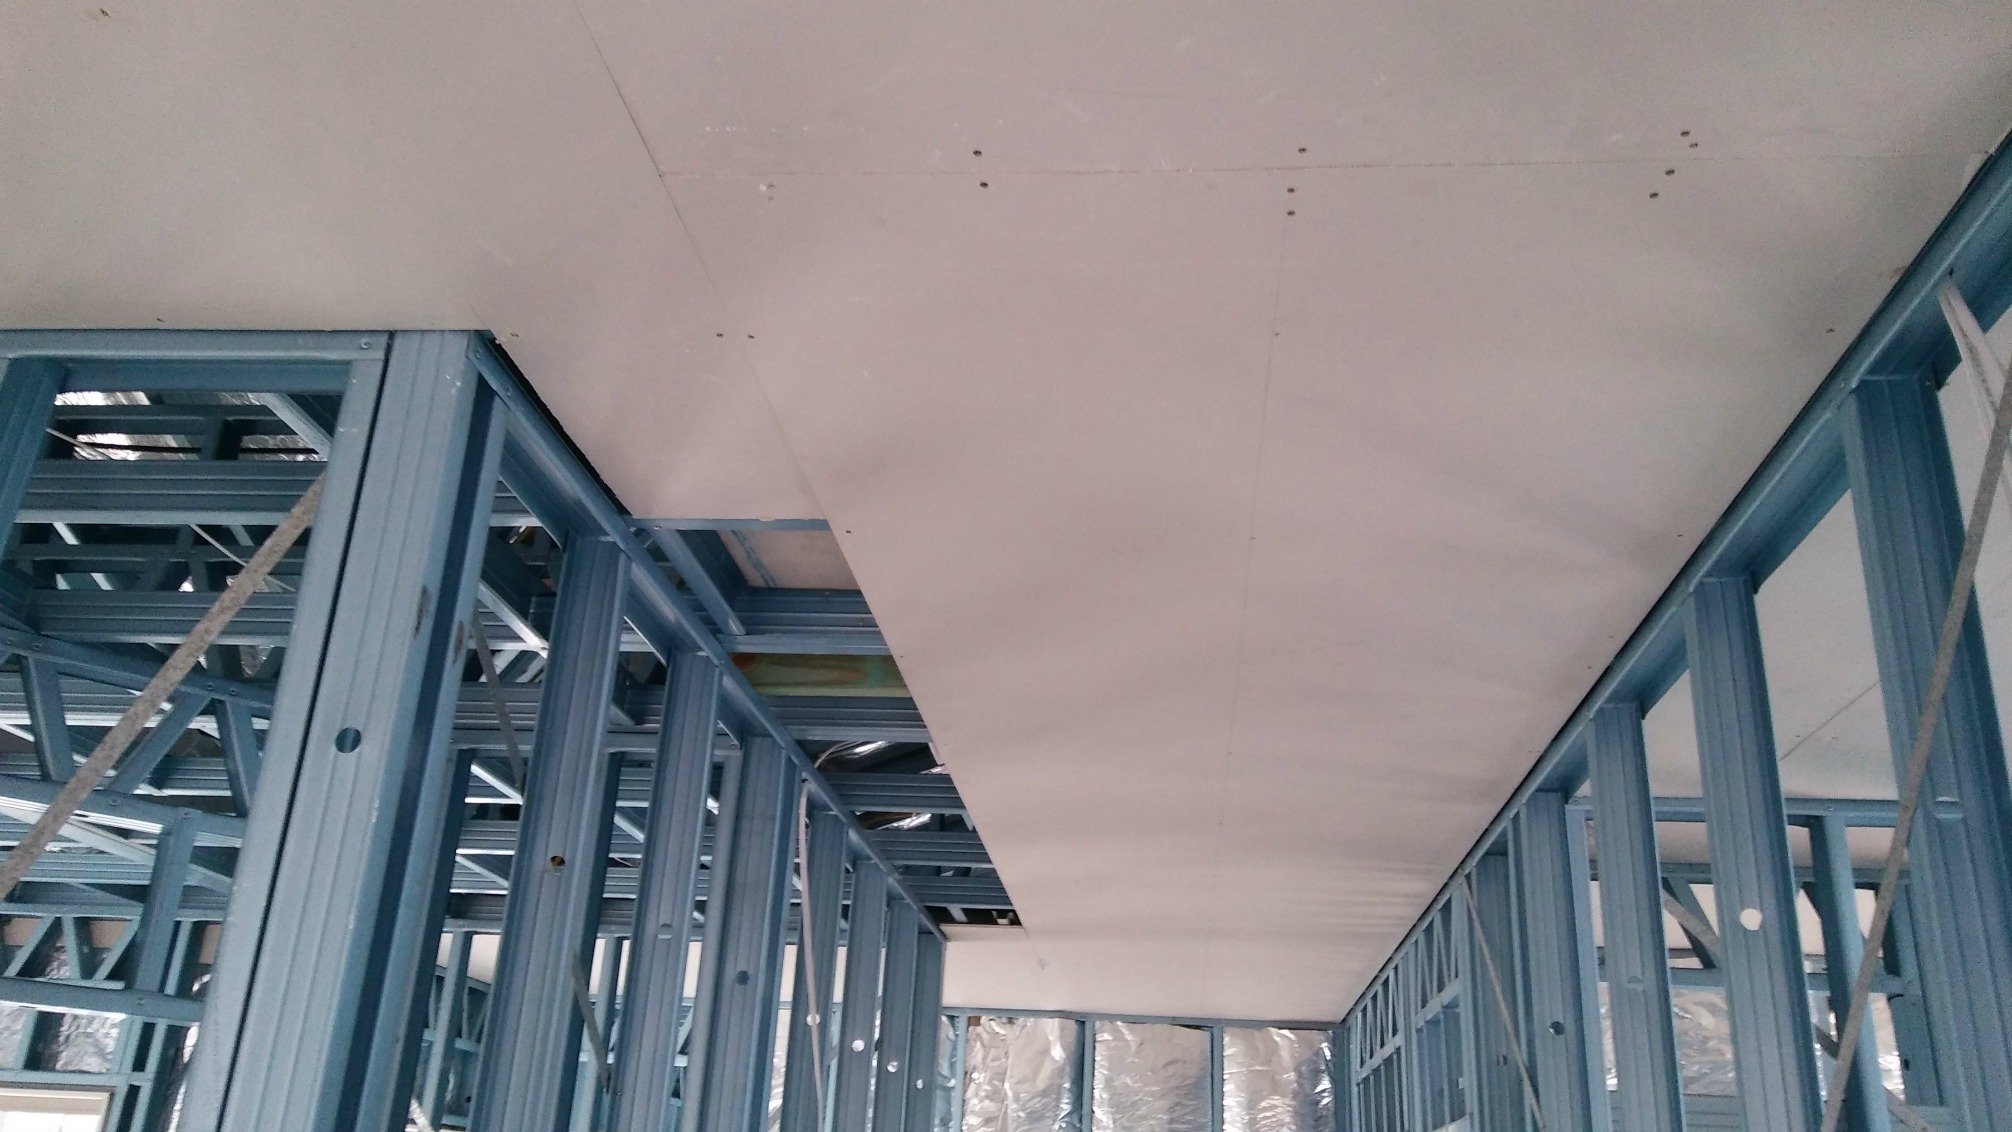 Ceiling sheeting installed
More Drywall Tips
- Try not to force sheets into a space
- Always install ceiling drywall first before the walls
- Lay sheets flat on the floor until you’re ready to use
- Use a very sharp utility knife to avoid tearing• Use a file to trim off ragged edges• Minimise the number of seams for better finishing results
- A friend will help the project go much more smoothly.
- For wall sheeting, add shims to the lower sheet to adjust to correct level before attaching
- Try to cut window and door sheets to surround them to prevent movement cracking
Drywall finishing: edging and taping
Special metal or plastic corner strips are used to finish the outside corners of drywall sheeting. Measure the length of the outside corner to be covered. If possible,the corner bead should cover the entire length of the drywall on the outside corner. Cut the corner bead with tin snips and fit the bead to the sheeting corner, manoeuver it until you have a good 90-degree angle on the corner.
When you are sure the corner bead is sitting square and vertical, put two or three nails or screws through the corner bead and into the frame to hold it in place. Have another look then continue to nail or screw every 20cm (8ins) along the entire length on both walls. You're now ready to apply joint compound to the corners.
Drywall taping tips
After the sheets are secured to the wall studs or ceiling joists, the seams between drywall sheets are concealed using joint tape and one or two layers of joint compound. This compound is also applied to any screw holes or defects. Use a 10cm (4in) joint finishing knife to apply a thin coat of joint compound.
Center the drywall tape over the joint, press it into the first layer of compound firmly, holding the knife at a 45-degree angle. This should squeeze some of the compound out through the tape. Leave this layer to air dry for 24 hours.
Apply a fill coat over the taped compound, extending it a few inches beyond the edge of the tape. Feather the edges of the compound for a smooth finish. When the first layer is completely dry, sand it lightly and apply a second coat of compound mix, feathering the edges about 5cm (2ins) beyond the first coat. Let it dry thoroughly, then sand it lightly and apply a third coat using a very wide float. The total width of the final application should be about 30cm (12ins). When the final coat is dry, sand it lightly to a smooth finish.
The above plastering tips and info set out to show how to install drywall, and help show how achievable diy plastering can really be. Knowing how much drywall costs and having access to the increasingly extensive drywall tools, will have your interior kit home walls looking like a professional did the job.
Next stop is hanging interior doors here
Go back to Exterior Cladding
Go to Kit Home Basics home page


