Concrete Footing Details
for your kit home foundations
This page describes concrete footing details in an easy to understand, easy to carry out approach for the kit home builder. You have made the big decision (pros and cons for slabs vs piers) to lay a slab or build pier and beam footings and now need more details on house piers, pouring concrete footings and pier and beam foundations.
In particular, to build a concrete slab, specific planning, knowledge and skills are required to carry out this process as an owner-builder. Pier and Beam Footings are outlined below, but lets start with Slabs.
Slab flooring
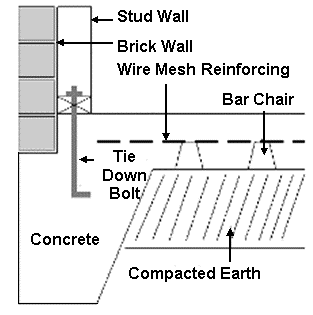
Initially, a house pad has to be cut
with an excavator/end loader, ensuring the raised fill is compacted
sufficiently to support the slab. Of course you have made the decision
that the cut is not too severe as to create concerns if there is
movement, unstable soil, or erosion potential. The deeper the cut, the
deeper the foundation footing has to be extended, in order to reach the
original ground level and the more reinforcing required to brace the
slab. Bottom line, the expense will rise as the cut deepens.
To build a concrete slab yourself you will need quite a lot of skill and experience in planning, boxing, laying vapour and pest barriers, reinforcing, pouring, screeding, finishing and curing. And an engineering plan to pass council regs. For info and graphics on this slab building go to our DIY Concrete Slab page
Pier and beam foundation design
Can you build a concrete slab? Are you up for it, or do you need professional concretors? In my opinion a handy ownerbuilder can do most kit home building tasks, but if you're not a concretor...get a professional mate.
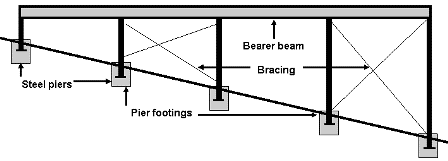
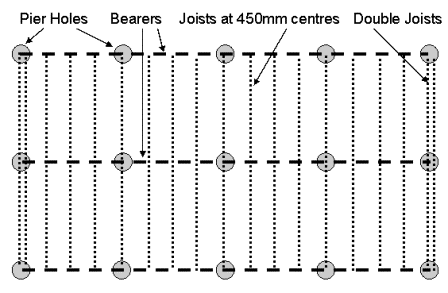
Your concrete footing detail on the kit plan will have a floor system plan outlining pier spacings and bearer/joist positions and spacings. Use this to do your initial house setout.
To get correct pier spacings check your concrete footing details, do your long divisions and make a template rod, making sure you follow profile markings and utilise plumb bobs on elevations. Check your markings three times. It's easy to be wrong twice!!
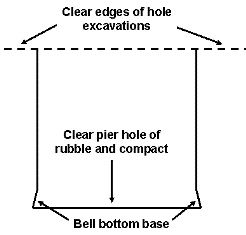
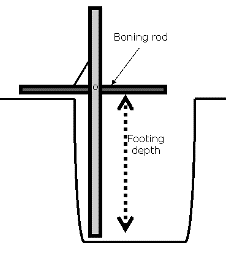
When the excavator is ready to dig your pier holes, have a short plumb bob handy to direct his auger vertically. Modern diggers have automatic guides. Clear excavation earth away from the hole regularly and use a pre-made 'boning rod' to check depth levels.
Get the excavator driver to remove all excavated earth from around the newly dug pier holes. Now it's time to finish the holes. With a shovel, cut a bell shape edge on the base to create a 'foot for the concrete, clear rubble from the base and compact the base with a heavy flat stamper.
When ordering concrete, have all your pier measurements ready (depth, diameter, number of holes) to give to the concrete provider and they will do the math for you. You could try it yourself if you like...Pye x Radius squared x height. Advise them of the mix specifications provided by the kit home engineers eg N20 with 80mm aggregate.
Tip: Add 0.2sq mts (2 sq ft) to your total concrete order to account for any variations. It cost far too much to get a truck back for a small amount to finish. Believe me you will only make this mistake once. Have another small concreting job ready for excess.
Concrete footing details: piers
Before pouring concrete footings, set up a theodolite to register an exact height for your piers. Make a decision on how many house piers you have the capacity to set in one session taking into consideration the amount of help you have, the heat and humidity of the day and whether the concrete truck can get close to the holes.
Give the holes a splash of water around the edge and the base so the concrete doesn't leach water into the earth, and the mix will stay fluid enough to position your piers. You could also lay some plastic in the holes to assist with this. Another method is to set up the piers with stays inside the holes. This will take some time and requires the theodolite to help set the heights and stringlines to line them up. It is painful to sink piers into concrete after it's poured so give it a go. Make sure you keep the access for the truck and don't bump the stays as you pour.
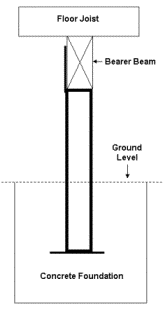
Concrete trucks come in all shapes and sizes. Some are 8 metres long these days so make sure of your access or an even larger truck will need to enter the property to get it out. Your concrete footing details will specify how deep to set regular steel piers. Finish with a small dome of concrete approximately 20-50mm above ground level around the pier to aid water disbursement from the foundation.
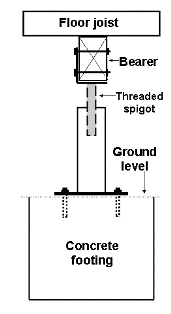
Again, check the plans of your concrete footing details if you are using adjustable steel piers, for specific pre-setting of fastenings into the concrete footing.
Go to our DIY concrete building page. Or go back to the Setting Out page. Go back to the Foundations page.
Have a look at this concrete slab pictorial.
Or go to Kithomebasics home page.

