Stages of Development Applications
 My kit home development application
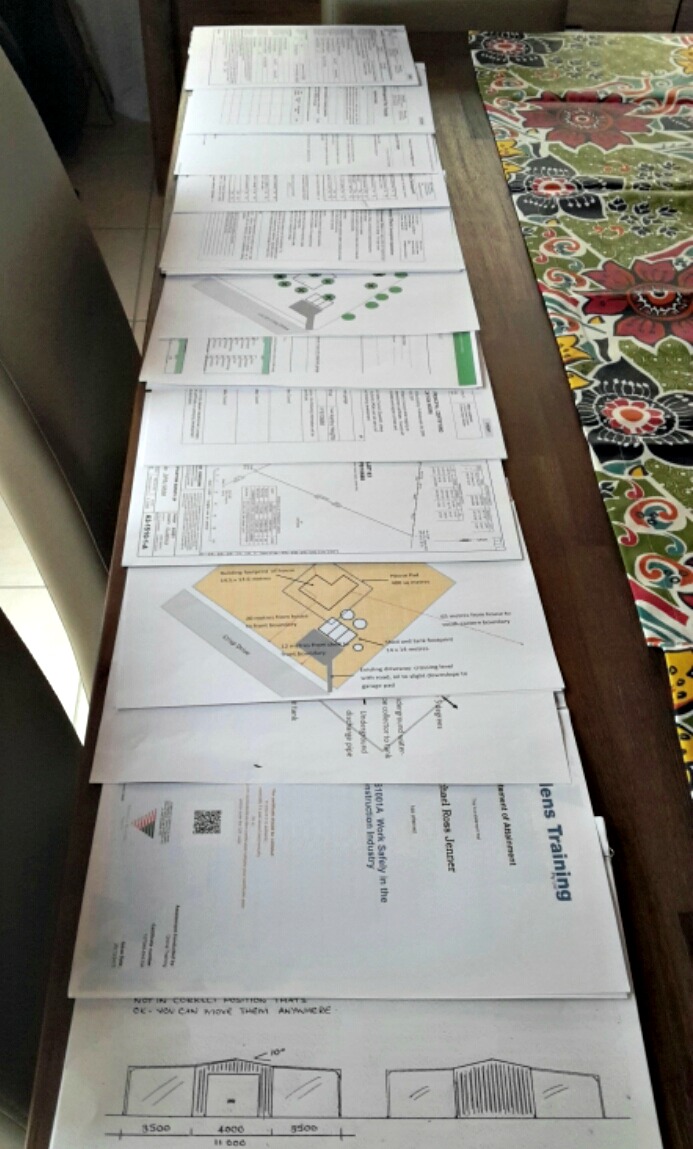
The stages of development applications for owner builders of kit homes, are numerous. Your application establishes whether you can legally build a dwelling on your property, and whether you can build your specific dwelling on your property. Investigations, research, meetings, surveys, plans, designs and reports are all part of the application. This is one of the first and major steps to building a house.
Your local authority's website will have a building and planning page containing all the factsheets, development packs, profomas and guidelines for the area you are planning to develop within. Find your way to the page and download the application packs. Included will be a development plan checklist: very useful.
The major form is a construction/development application that requires your personal, owner and owner builder details, land details, estimated value of work (a guide is provided), a simple description of the development, details of the proposal including land area, floor area, number of storeys, dwelling materials to be used: cladding, roof, floor, frame, and sewer management options.
This form also asks for documents. Lots of documents, and 3 copies of each. Depending on your region, some will be grouped together, others will have more.
It is well recommended to have at least on pre-application submission meeting with council representatives to make sure you are on the right track, your development idea is assessable, you don't do what is not needed, what level of detail is required, and what stages of development are are specifically required for that authority.
Stages of development applications for kit homes
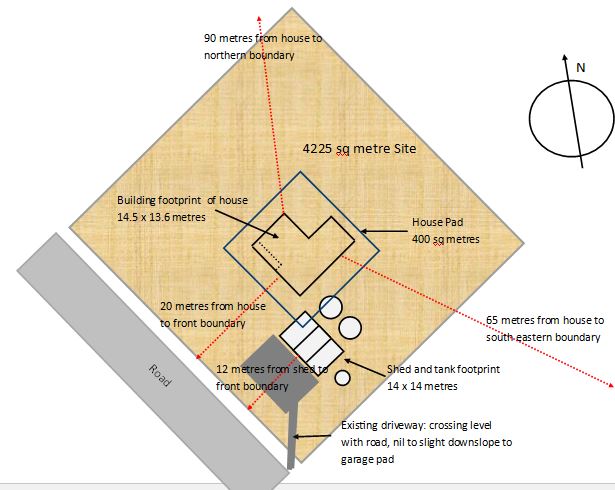
Stage 1: Scaled site plan
Draw a plan of the dwelling and garages situated on the land. Add distances, land boundaries and setbacks, major vegetation/trees. Site contours are good too. This can be hand drawn if you have the talent, otherwise it can be done in MS Publisher or other PC drawing application.
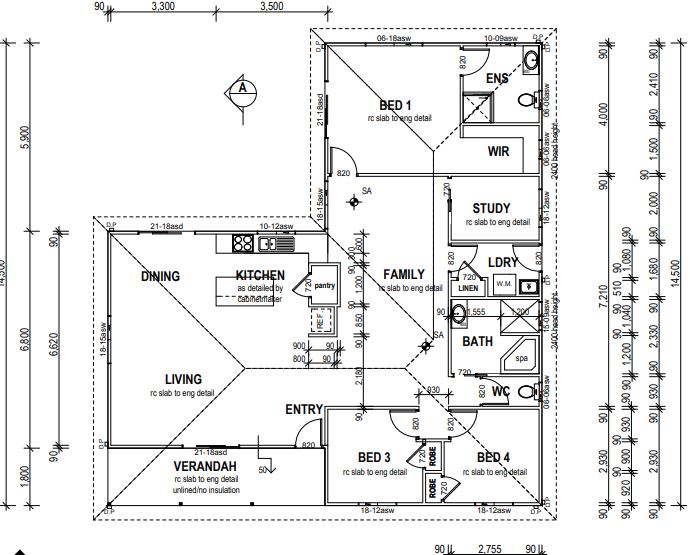
Stage 2. House plan including shed plan
The kit home provider will provide 3 copies of the house plans, including elevations, floor plans, framing, floor slab layout, and sections. This can be in A4 size. Submit the garage plans at the same time as the DA to save further fees.
Stage 3. Statement of environment effects
This form allows you to outline the environmental impacts of your development and the way in which it will operate. It refers to how the development complies with zoning, privacy invasion, discharge of stormwater, character of the neighbourhood, any effect from the property access point, vegetation clearing, erosion control during works, property risk reduction eg bush-fire or flood provisions. For a kit home this is not as arduous as it seems.
Stage 4. Basix committments
Building Sustainability index: This is an Australian certificate which confirms the proposed development will meet requirements for sustainability. It asks that the builder commits to water storage, energy and thermal comfort through natural ventilation, insulation, lighting, cooling and heating. It asks you to seek sustainable development goals that are achievable and agreed upon.
Stage 5. Stormwater plan
A simple plan showing the placement of water tanks, pipework, swales and drains that direct stormwater away from the dwelling and from adjoining properties.
Stage 6. Waste water/system plan
A detailed plan drawn by the plumber that outlines the proposed sewer or septic system that complies with the property and dwelling situation and size. It needs to show dwelling outlets, underground pipe, connection to sewerage or septic, tanks, drain fields, reed beds etc.
Stage 7. Waste management plan
A proforma is usually provided that uses a table to break down all of the material used on the build and what will be done with leftovers. This can include reuse, recycling, or disposal. A plan also needs to be drawn of the site showing entry and exit pints for delivery vehicles, reusable wood/steel site, excavation material site, recyclable site, a rubbish containment setup and where the sediment control mechanism will be constructed.
 Bushfire Assest Protection Zone map
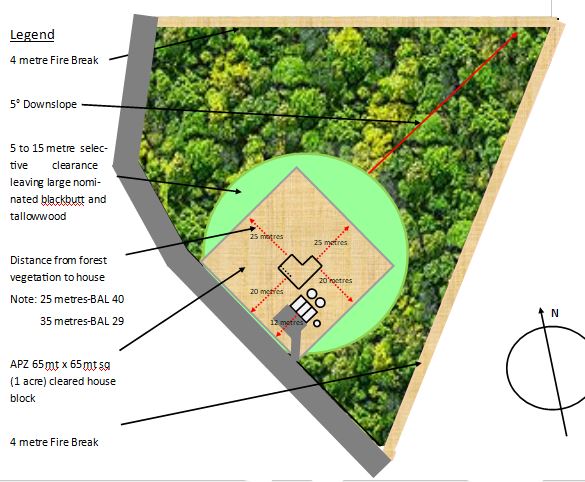
Stage 8. Bushfire threat/Fire safety plan
This is a form that calculates the bushfire-attack-level of the proposed site. Sometimes a plan of the Asset Protection Zone around the site is required as well as a written submission outlining what standard of building materials will be used. Those materials may include, steel insect screens, thicker window glass and metal window frames, steel roofing, blueboard cladding, steel gutter guard, steel house frame, concrete slab and fire fighting provisions. More on this topic here..
Stage 9. Vegetation controls (clearing)
This form may be part of the environmental impact form in some areas and describes the tree and vegetation clearing required to situate the dwelling on the site. A plan is sometimes required showing where trees are to be removed and which trees will be retained. This can also be part of the Asset Protection Zone plan.
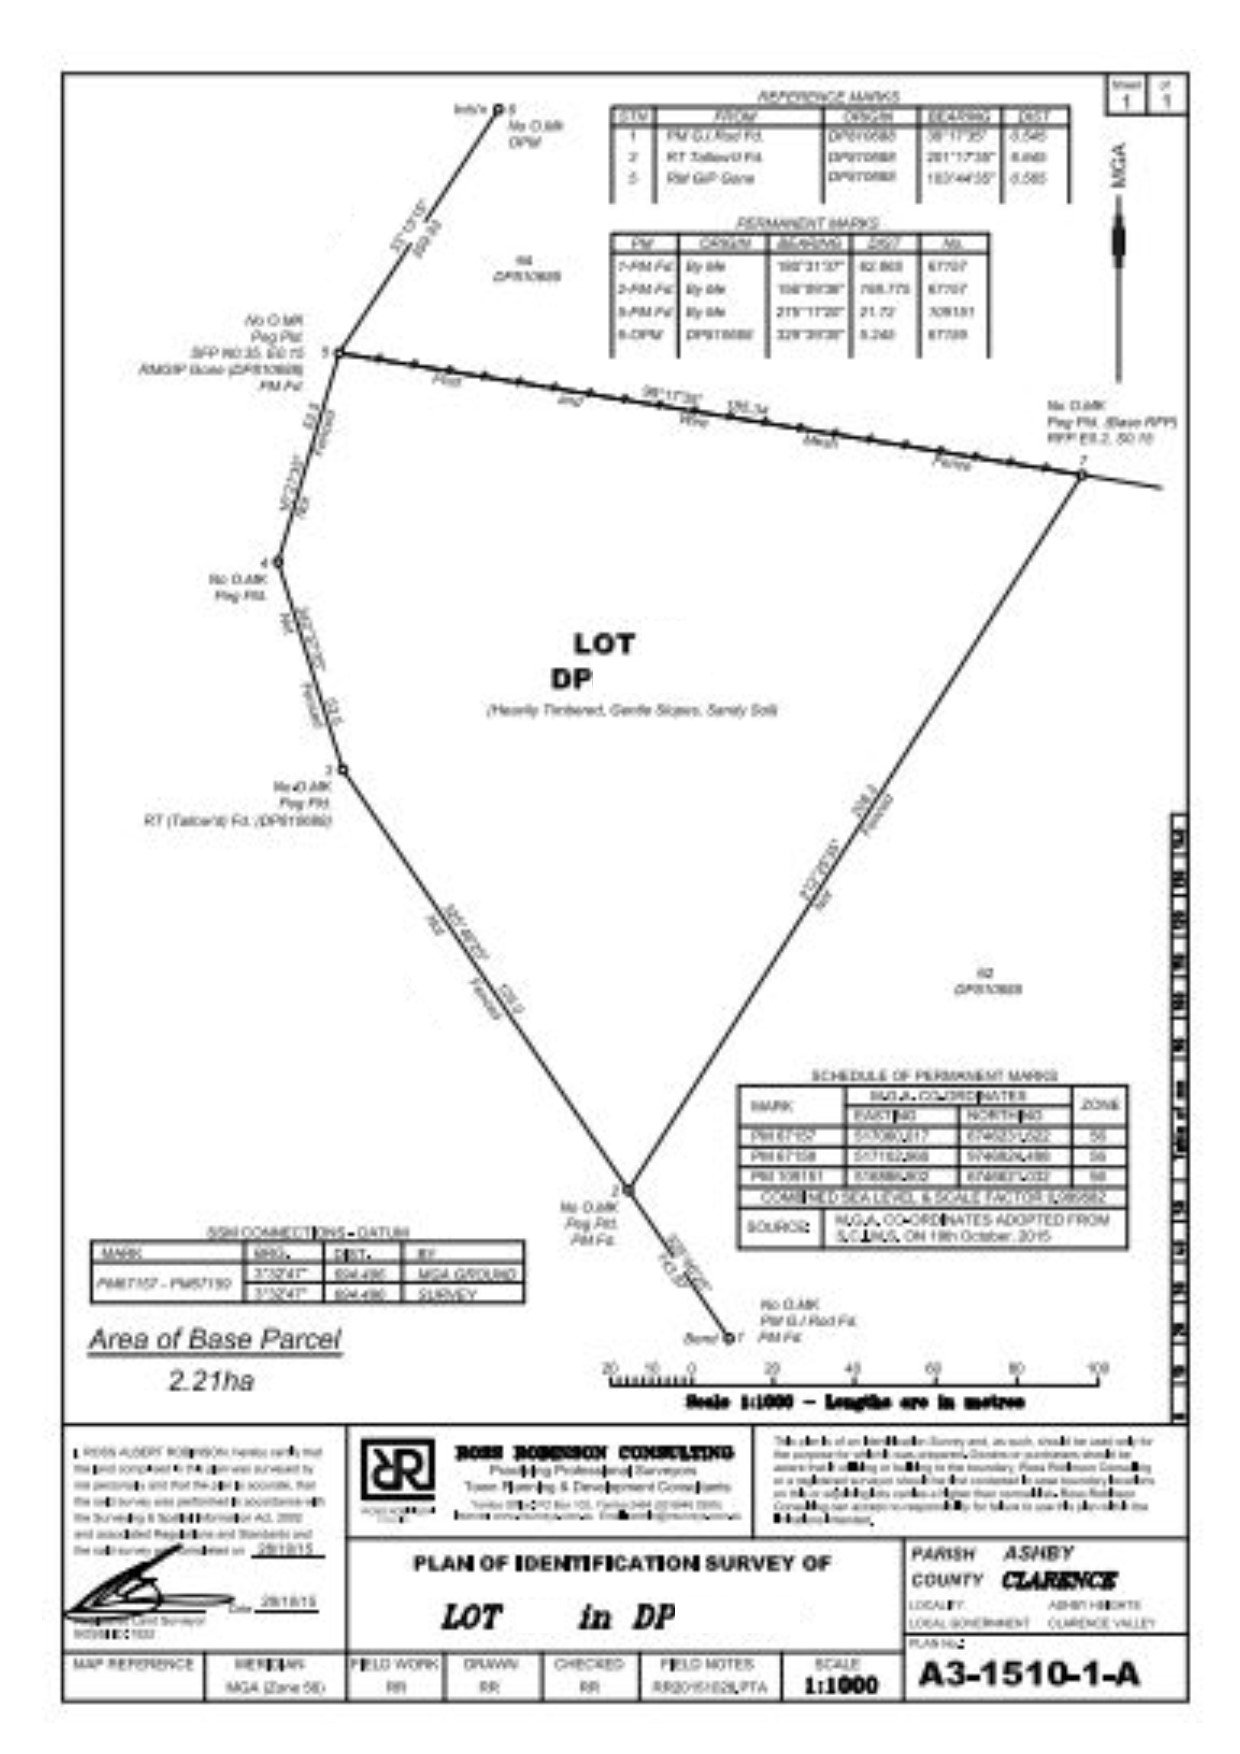
Stage 10. Land survey
Up to four documents supplied by the surveyor including a Cadastral Records Enquiry Report showing the land parcel in the street, parish or district, a title search report, a boundary marked plan of the property, and a contour plan.
Stage 11. Application for residential/rural address
A simple application for an address to be allocated rather than a lot number. Very important if you want utilites to be installed, and for your address to be on the drop down list of any web govt authorities/banks/insurance applcation.
Stage 12. Application for driveway access crossing
In some districts, an engineered plan of the driveway access crossing from the road into the property is required. It may require an engineered pipe/rural crossing, dish crossing, kerb layback, bitumen sealing etc. A proforma is usually provided for this application.
Stage 13. Principal certifying authority (contract)
The council requires nomination of someone to certify the building works, namely the slab footings, rough in plumbing, septic piping, constructed frame, plumbing, and final occupation. This is done via a contract with the council or a private certifier of the owners choice.
Last stages of development application: After approval
After DA approval from the council, the next step is obtaining a construction certificate to proceed. For this certificate the council needs:
- An owner builder permit
- A3 size house plans
- Concrete slab engineering and plans, cut and fill plan and soil tests
- Frame engineering specifications and plans including wind ratings and tie down details
- Truss Certification, Glazing Suppliers Certification and Energy Rating Certificate, Plumbers Certification, Electricians Certification.
This looks to be a mountain of red tape, but all can be achieved by an amateur builder with little professional input. Try to avoid being talked into expensive professional assessments for fire dangers or environmental impacts unless directed to do so.
The many stages of development in the application took me about eight weeks to fully compile these documents, mostly because of the need to get soil testers, plumbers and surveyors on site, but also to get their completed documents. The fully drawn house plans take time to be completed as well. Assembling your application guarantees your property development plan has merit and has a chance to be completed.
Go back to Home building plans or return to Home page.


