Build a Ladder Clothes Dryer
I built this ladder clothes dryer after finding my oregon pine ladder in storage and wondered if I should throw it out or use it. I spotted a couple of re-purposing sites and found the idea looked good so had a go.
Living in Northern NSW where it rains constantly, we needed an indoor arrangement that wasn't an electric clothes dryer. We were constantly racing to the outside line to bring in the semi-wet clothes and hanging them on the curtain rails. So our ladder clothes dryer was the answer.

Ladder clothes dryer: preparation
|
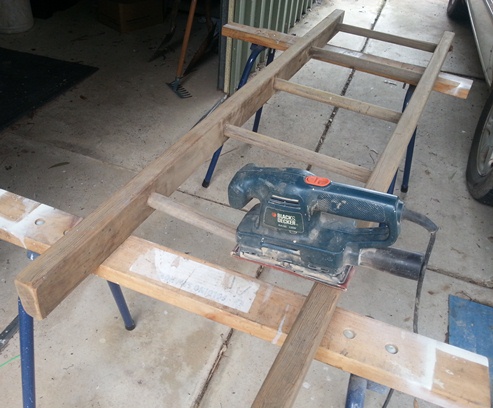
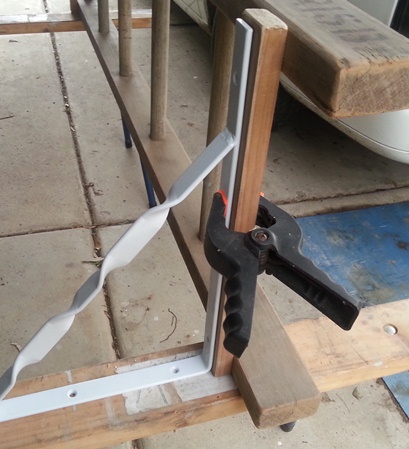
First thing was to cut the ladder to the length required and trim the edges where required. I then gave it a good sand with the trusty orbital sander. Giving the ends and edges extra attention. To give it an aged or stressed look I gave it a coat of very low strength paint, that is, water with some paint in it. I then had a look at the wall and how it should be hung and decided to do an 'underside' shelf bracket arrangement as I figured there may be substantial weight in a heap of wet clothes. As the ladder was different widths at each end, I needed a base for each bracket to fasten to. I added 30x20mm pine across the ladder to secure the bracket to.Next step was to prepare the wall for attaching the brackets to. Using a level, I marked of the exact points to drill. I bored into the brick with a masonry bit with some tape to measure the depth I was going in. Then I put Dynabolts in the top section and expander nails in the base. After that I placed the ladder on top of the brackets and screwed it tight. The last thing we will do is paint the wall and the brackets to help it blend in. It has been a fantastic addition to the laundry as it has rained for a couple of weeks now, and has been very useful. We also run a
blow heater in the room to speed up the drying. |
  |

Go back from Ladder Clothes Dryer to DIY Projects or
Go back to Kithomebasics homepage


