Tilted Residential Solar Panels

My residential solar panels were installed in a day by a team of three workers including a qualified electrician. That's from start to finish in eight hours.
An initial survey by the salesman showed we needed a different setup to the normal north-side array: I'm in the southern hemisphere remember.
So a few preliminary negotiations above the quote were done and off we went.
Normal solar installation is an easy job, for the pros, but this installation required some increased engineering in the form of tilted solar arrays.
Complex roofs, for instance, multi-gabled, may not have the roof capacity on the sunny side to support the amount of solar required. Enter...tilted arrays.
Installing residential solar panels
- Site survey
- Compare quotes
- Contract signed
- Array installed
- Inverter installed
- Grid interaction meter installed
- Supplier system check
I chose a 1.5 kilowatt system which consisted of a compatible inverter and 8 x 190 watt photo-voltaic panels. It cost about $2000 after rebates plus another $800 for the extra tilt framing.
I also chose a 'gross' system for billing i.e. I send all created electricity back to the grid, get paid for it, and then buy what I need.
This makes no difference if the created payment per KW is the same as the bought cost per KW, which appears to be our future as the government slowly lowers the buy back payments.
My roof faced north, which was fine in the southern hemisphere, but I had some large trees on my boundaries which shade the house in winter.
This meant I had to move the array back from the northern edge of the property by placing it out in the yard on a structure or some other idea.
I decided to move the array to the other side of the house and place it on a tilt frame. This gave another 2-3 meters of sun distance from the trees.
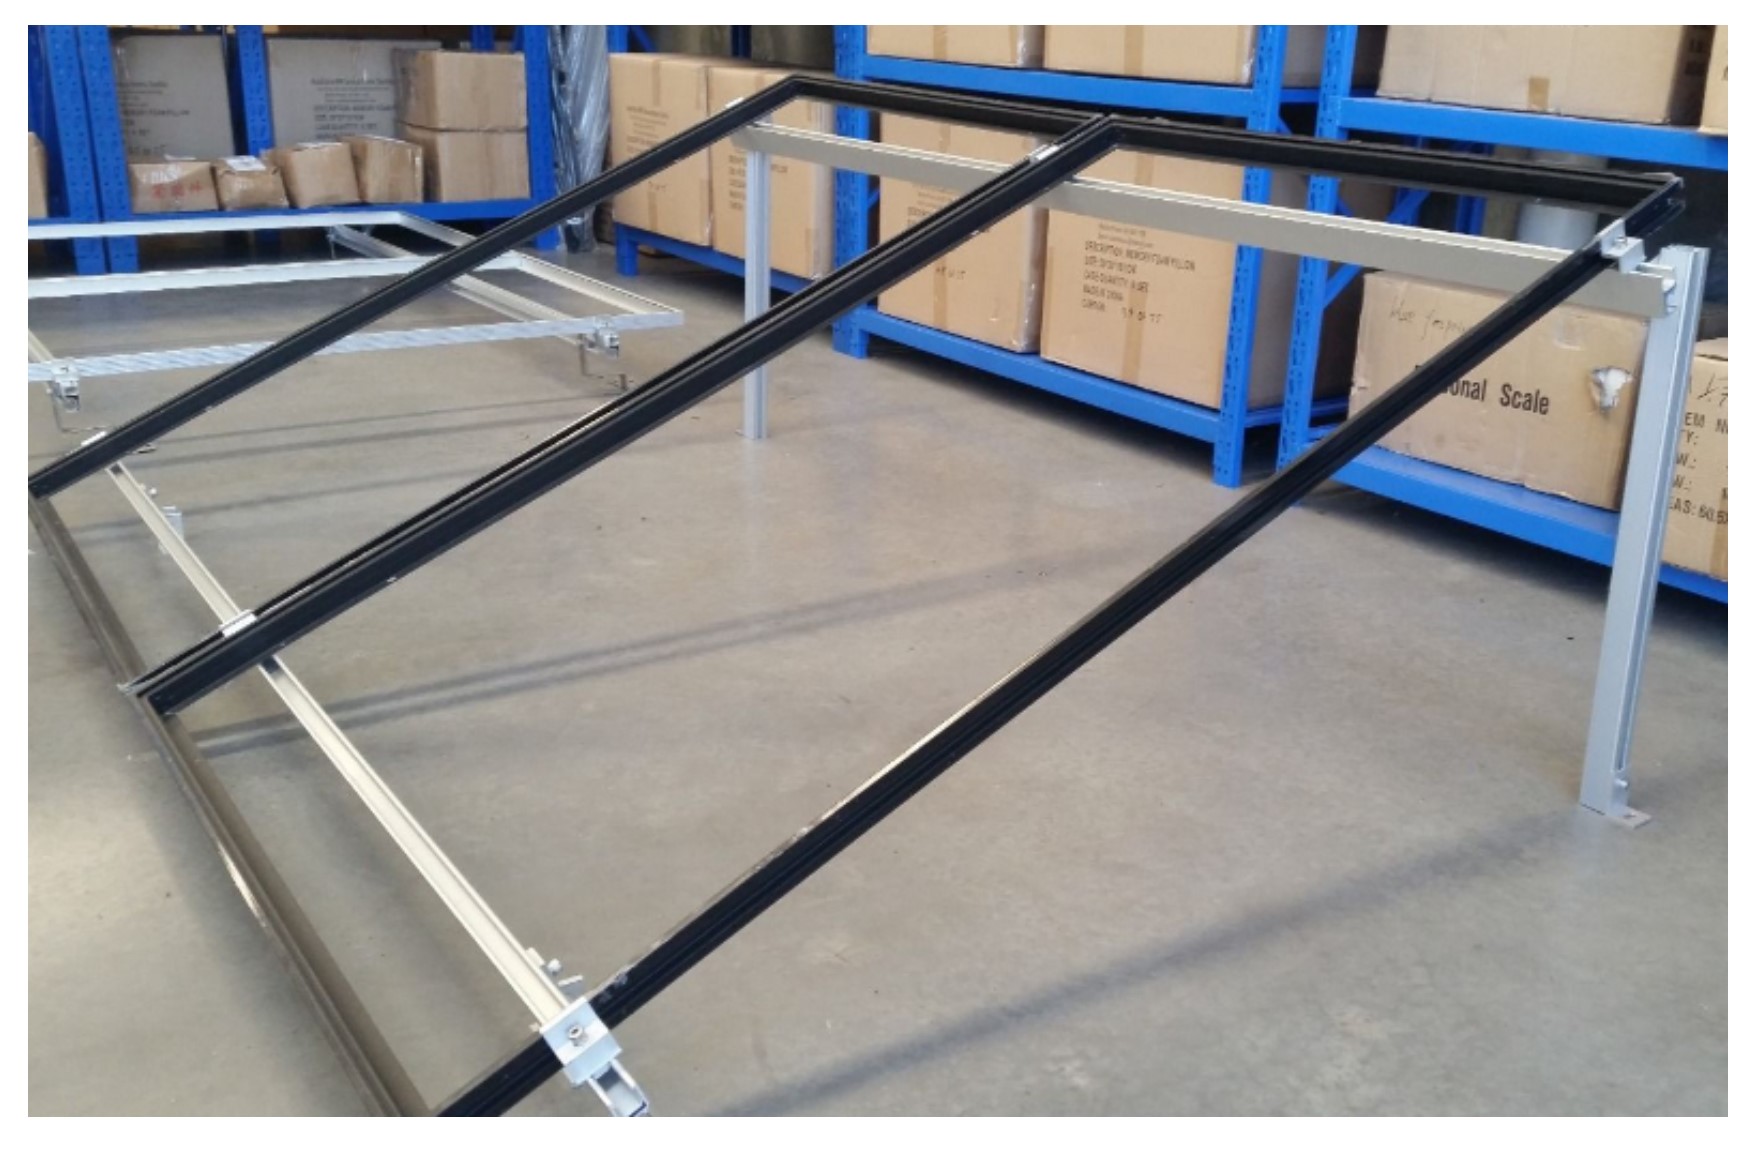
The tilt frame is constructed from the same H frame aluminium channel as is used to seat normal arrays.
If you live in areas where you receive more "weather", more engineering will be needed eg for snow or high wind.
The electrician installed the inverter next to the power box although in the suburbs he advised the inverter should be secured in the garage.
The inverter has a digital display that cycles through 'present output, daily output, and total output'.
Vital to the solar power installation was a splitter box installed between the inverter and the power box, a grid interactive meter installed inside the box as well as a second main switch to disable the solar system.
The last step in the process was to have my electricity supplier come out and check the my residential solar panels and the installation, so it could be 'turned on' and connected to the grid.
This can take a while depending on how many are being installed in your area.


So far the system has worked well delivering between 900-1200w input and developing up to 8 kw-hours per day. As we use nearly 11 kw-hours per day it seems we are doing ok for such a small system. We haven't generated any more than 1.2 kw in any day so we are contemplating adding a panel.
We talk about whether we should have set it up on a 'sun tracker' out in the yard. We also think now, about whether we should have bought a 3kw inverter so that if we wanted to in the future we could have added another 8 panels.
The fact is, we bought the amount of residential solar panels that we could afford at the time and it works well for what it is, and we are very happy we installed it, given the current rises in electricity charges.
But, it doesn't matter how much power prices rise, I will always develop 50 to 80% of my own free power. And it will pay off in less than a year.
For Passive solar plans Click Here For Sustainable House Design Click Here . Return to Kithome basics home page
So what is residential solar power?
Solar energy for homes is produced by a connected group of photovoltaic modules or panels usually setup as an array on a residential roof. The panels convert solar light into electric current via a 'photo-electric effect', the outcome being DC electric power. This power is fed into an Inverter to convert the current into AC power, usable in a residential household.
Advantages
- It is delivered everywhere, everyday
- It is completely free to use, collect and store
- It is free from transportation costs
- It is free from pollution
- It is an unlimited resource
- It is the most reliable source of energy
- It is clean power with zero emissions
Disadvantages
- High initial cost
- Sun is not always available, clouds will reduce production
- Production of panels creates pollution
- Corrosion and hail will degrade and damage panels
- High space requirement for useful energy production
- Old panel and battery disposal is an issue
Q. I'm near Boston trying to install solar on a complex roof on historic Victorian home. West and South sides are fine but not enough panels. I thought to add a tilt frame on the East side and the image on your site looks right, but I can find no details of construction or materials nor any insights into the gotchas of such an install. The solar contractor said he never installed a tilt frame :( Can you give me some advice ? tks
Jeffrey
Hi Jeffrey
I can only give you advice from my experience with these panels as I am exactly half a world away from you (Australia), and I am not a solar installer. It sounds like you require tilt framing for similar reasons as I did, and I was able to have them installed by the solar guy I was using. He had the frames and installed them. They are just aluminium H channels, exactly the same as the frames all solar panels sit on, cut to fit, fastened through the roofing into the rafters or battens, depending on the roof structure. The uprights are also H or U channel and so is the cross bracing. The angles are set up exactly like normally placed panels are set. They add a few fancy brackets to aid the angle set up, but I could make them, albeit in a less complex fashion. Pros...the set back really does help gain 'sky' for your panels if there is shade on the other side, or the other side is filled up with panels. As long as they don't shade each other, you can put up more arrays per square metre. Minor cons...birds love to perch on them, and leaves get caught up behind them, so you may have to get up there now and then to maintain them. They look a bit odd.... as we say, like a pimple on a post. My advice to you, given your area, is to get higher strength frames, as they will probably have to hold the weight of snow and withstand the odd blizzard. All installers here (Australia) have tilt frames available. I would ask a few other installers around Boston, or get your preferred guy to ask his frame supplier to provide them. If not, I spotted this one on Ebay! (see pic).
I hope that helps your project.
regards
Michael
Hi Again
I talked to Ironridge who make mounting frames; the tech said this is often done in the USA but the install must be calculated and certified by a licensed engineer after calculating strain from wind and snow and the construction of the roof. He said the customers who've done it use Ironridge's standard flat-roof tilt frames but add to them to raise the PVs up over the roof peak to face the sun. It's called "reverse tilt on pitched roof" He said you have to leave a gap between the bottom of the frame and the roof to allow wind through or the pressure is too high. I'll climb up on the roof Monday with the contractor to see what we can figure out. Another contractor found space for only 13 panels which would support 55% of my load; I'd like to get another 4 panels up there at least. It'd be atop a 3-story house so you can't see if from the street.
Thanks for your ideas on this.
Kind regards,
Jeffrey


