Building a garden shed
with a steel frame
A garden shed can come in all shapes and sizes and can be bought as complete kits ready to erect in your back yard. But I hate those sheds!!! I built a wooden shed a couple of years back to try and work out if a wooden kit shed was cheaper than building it with individually sourced materials.
That 3.6m x 2.4m skillion roofed shed cost me about $3k, and a similar wooden kit shed would have cost between $5k and $8k depending on components, but, I could have erected it over a weekend, rather than over 2 months of weekends.
This garden shed would be built using left overs from my recent steel framed kit build, so it shouldn't cost me much. I had about 12 x 5m left over steel framing studs, lots of steel roofing battens, some colorbond roofing offcuts and 6 full sheets of external blueboard cladding.
I also had left over jointing compound, house wrap, metal strap, gutter brackets, a box of tech screws, a box of blueboard screws and some roofing screws.

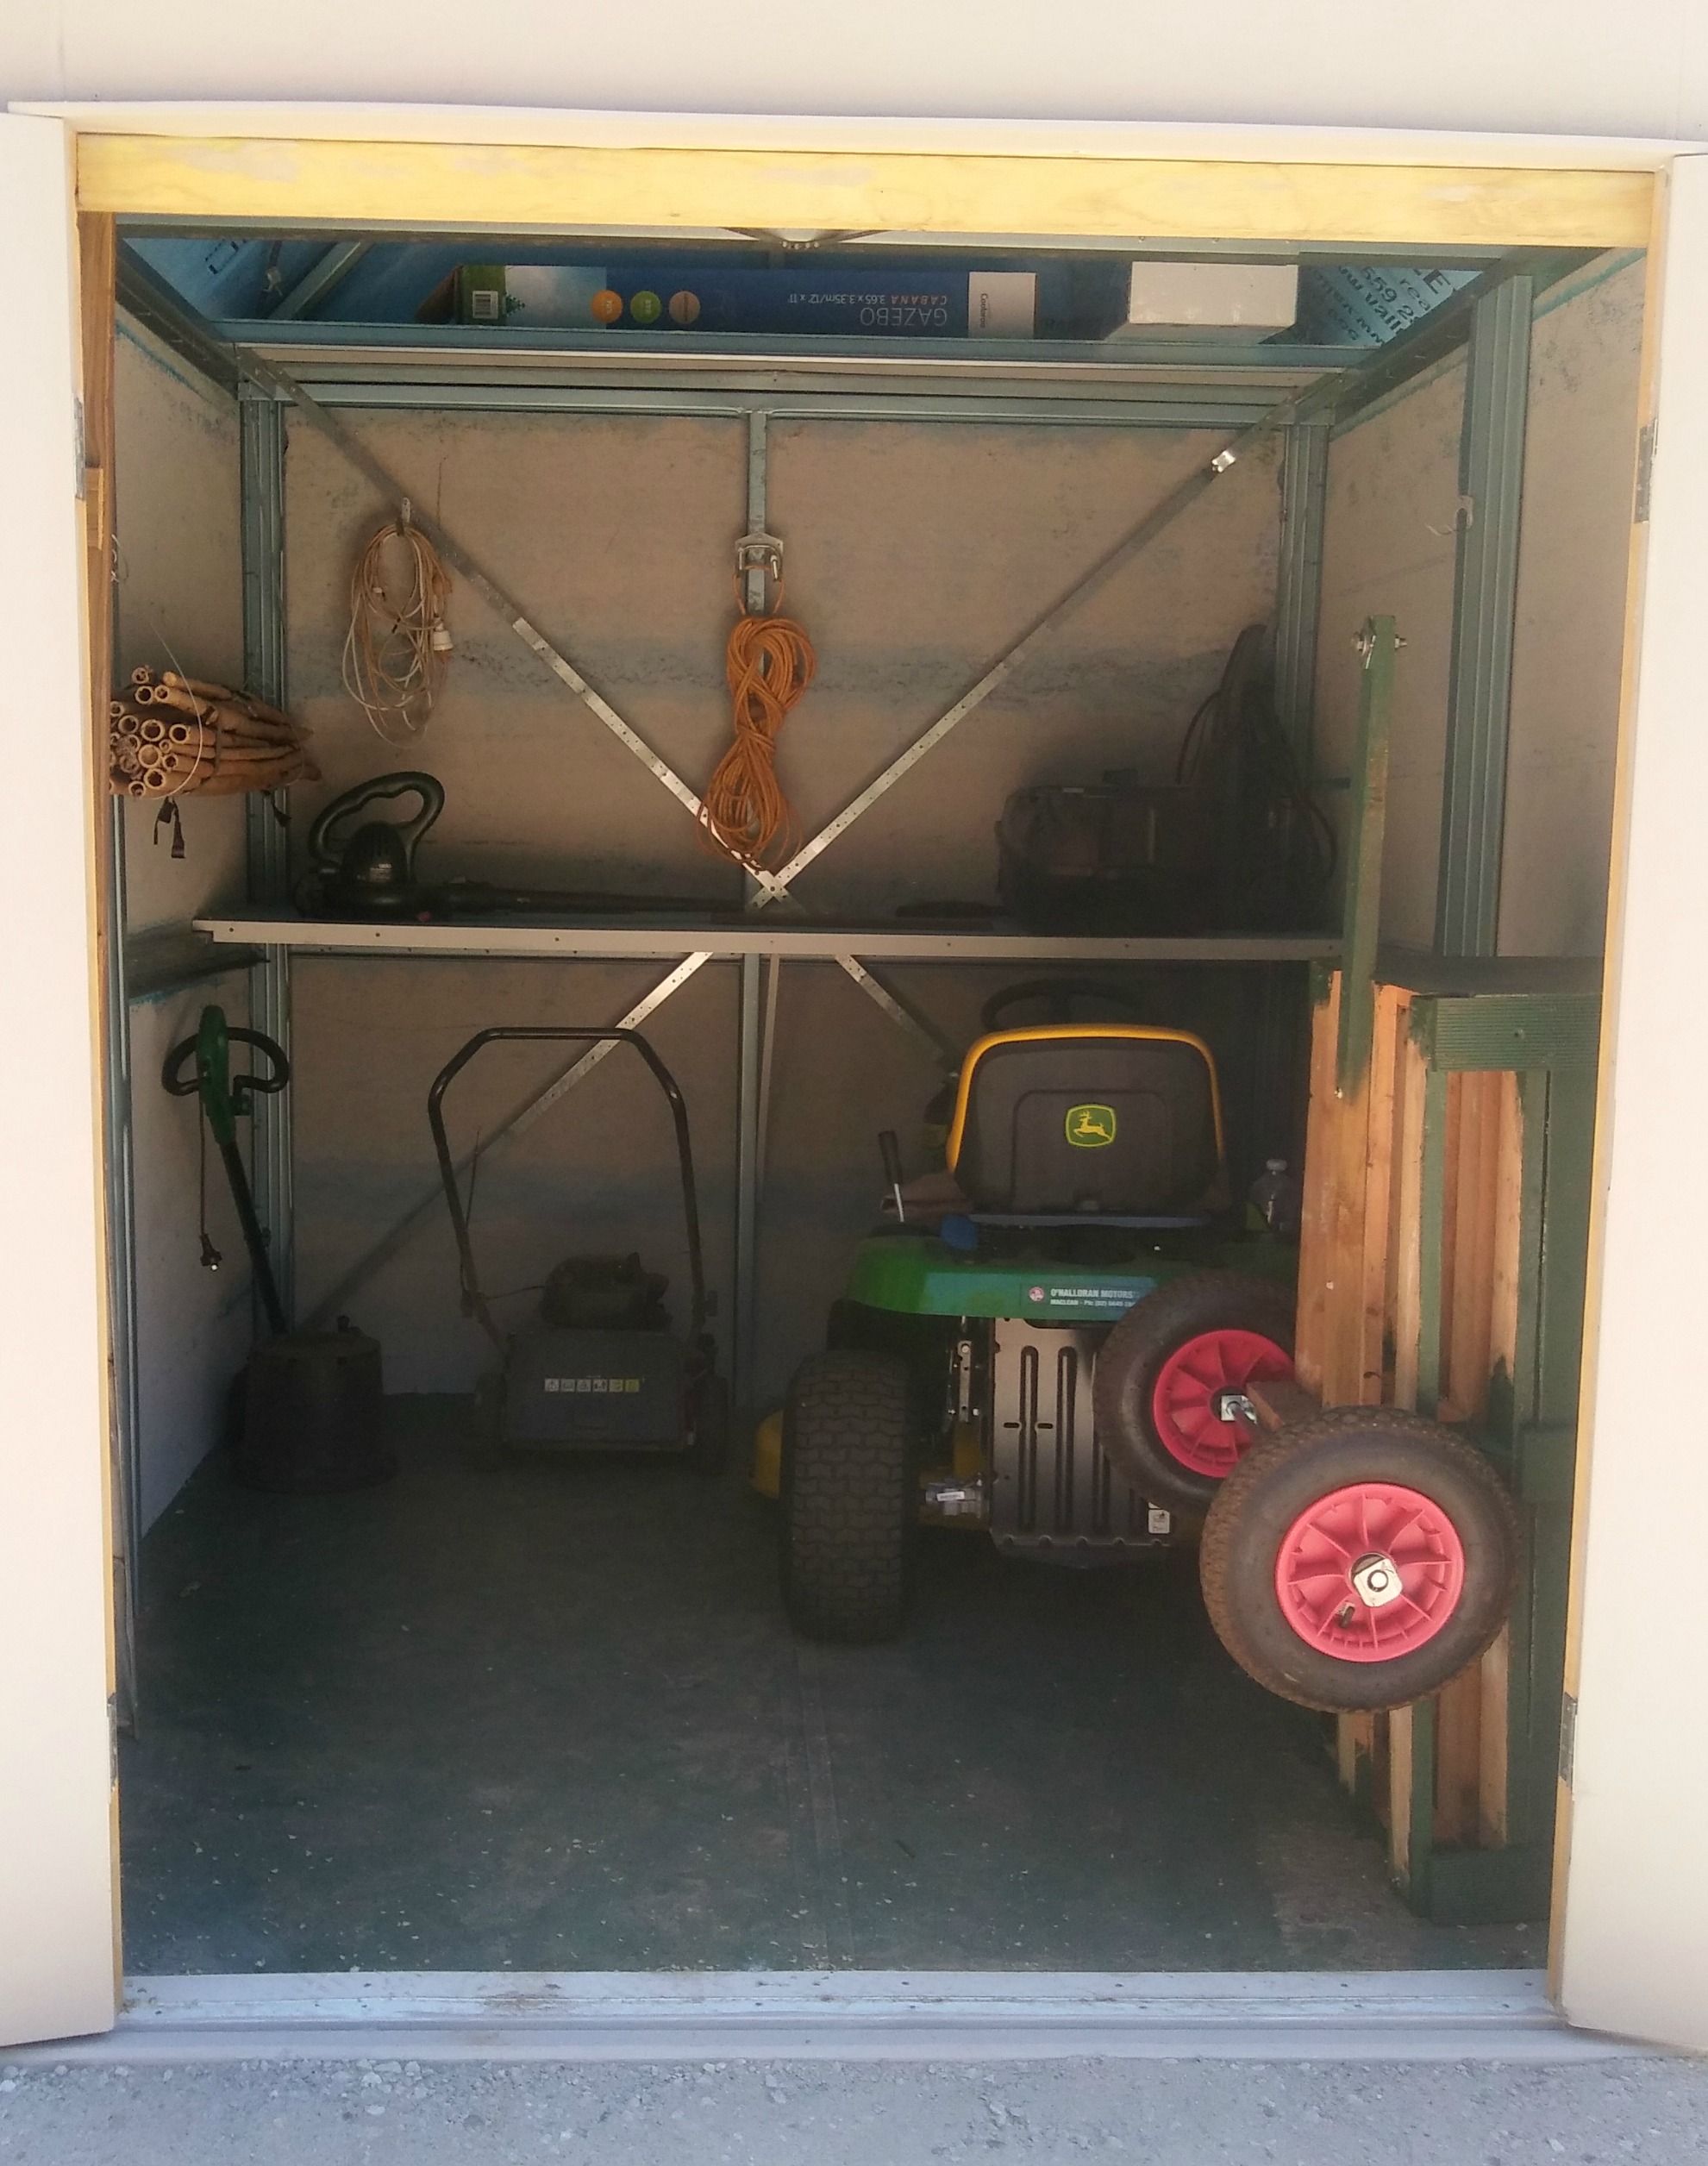
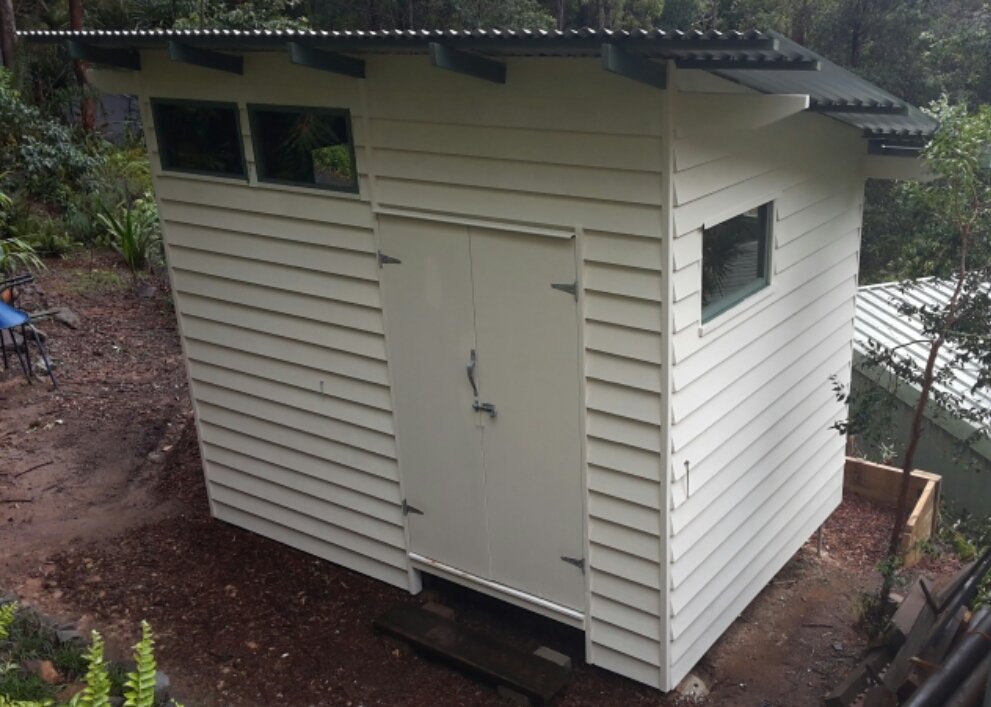
I thought I'd build something a little different, with a couple of functions. This garden shed would house the rider mower and hand mower, plus have storage for garden and yard stuff, and lastly have a dry place to store cut fire wood. Based on the sizes of the materials I had, a 3m x 2.4 base was as big as I could go.
Why? I decided to make a raised floor from the steel framing and using blueboard as a flooring and the blueboard was 3m x 1.2m, so two sheets beside each other worked. I figured if I was going to later store a piano in there, I could rip it up and fill it with concrete. As I couldn't build a wide shed I decided to go tall and take advantage of 'loft space'. The peak of this shed is about 3.6m high. I also decided to extend the left hand side roof down to create more overhang as a place to store the fire wood. It looks a little kooky without the wood now, but when it's stacked up it will make sense to those who require symmetry.
Garden shed floor construction
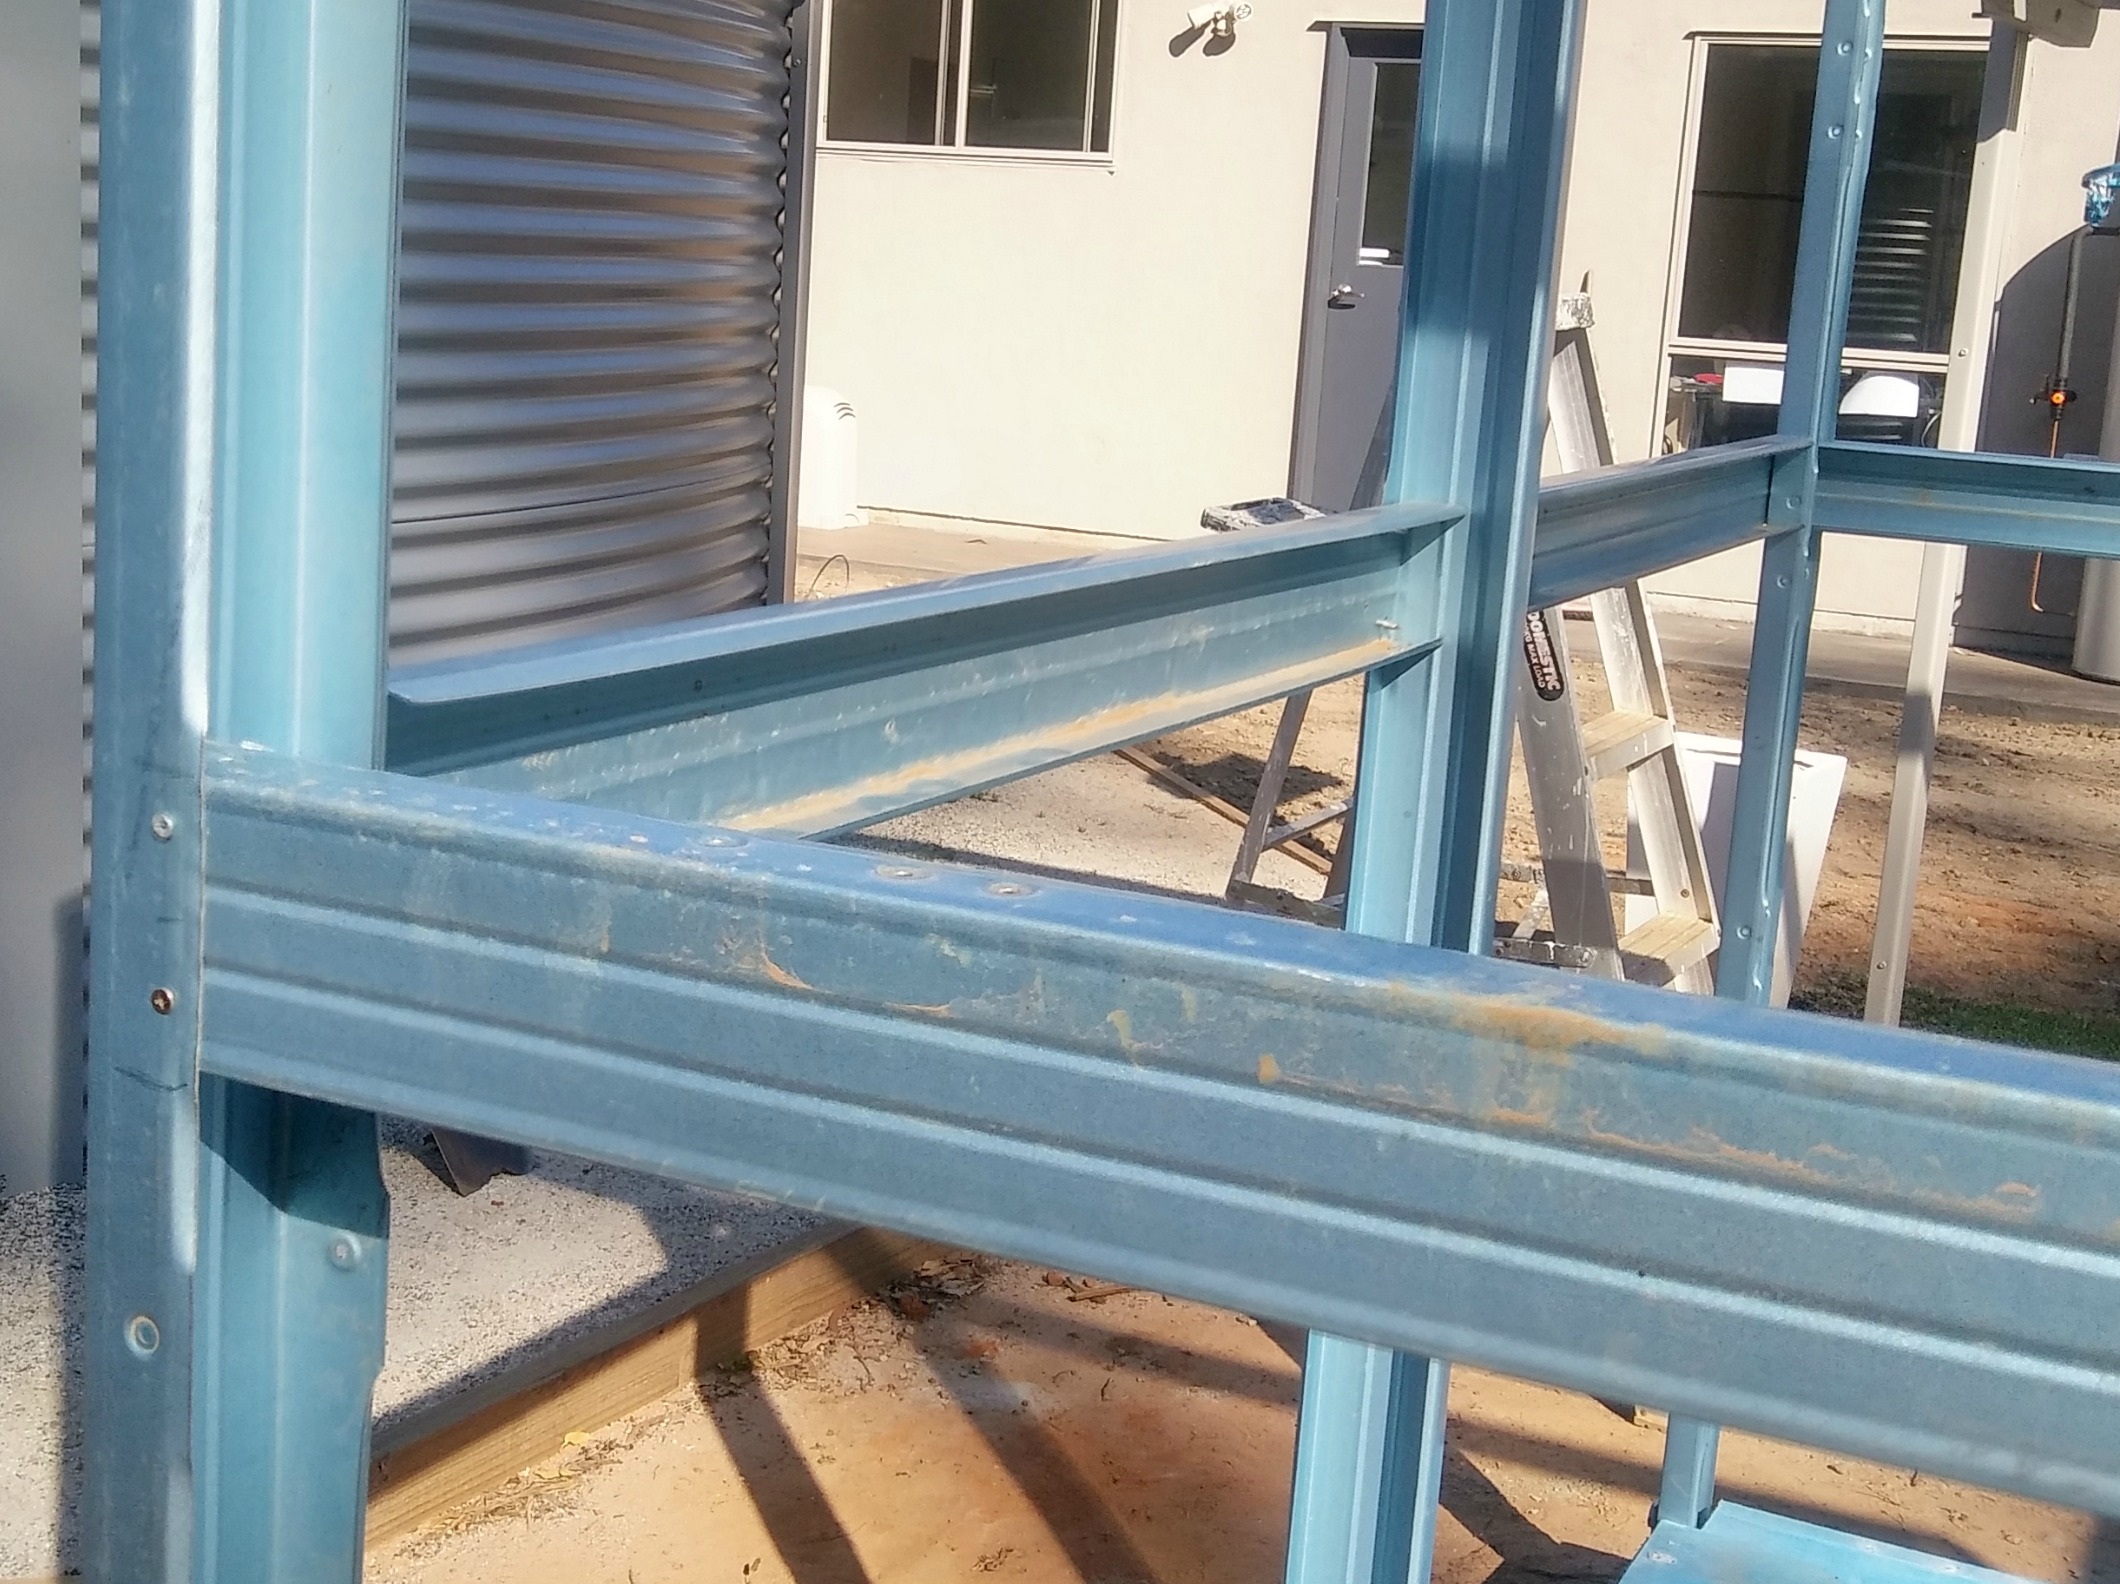
I assembled the outside of the raised floor frame on first using all the tricks I had learnt building the house frame. The most important being not slashing myself on the cut steel edges.
I used tin snips to create lapping corners and tech screwed them together as well as bolting four galvanised stirrups to each corner.
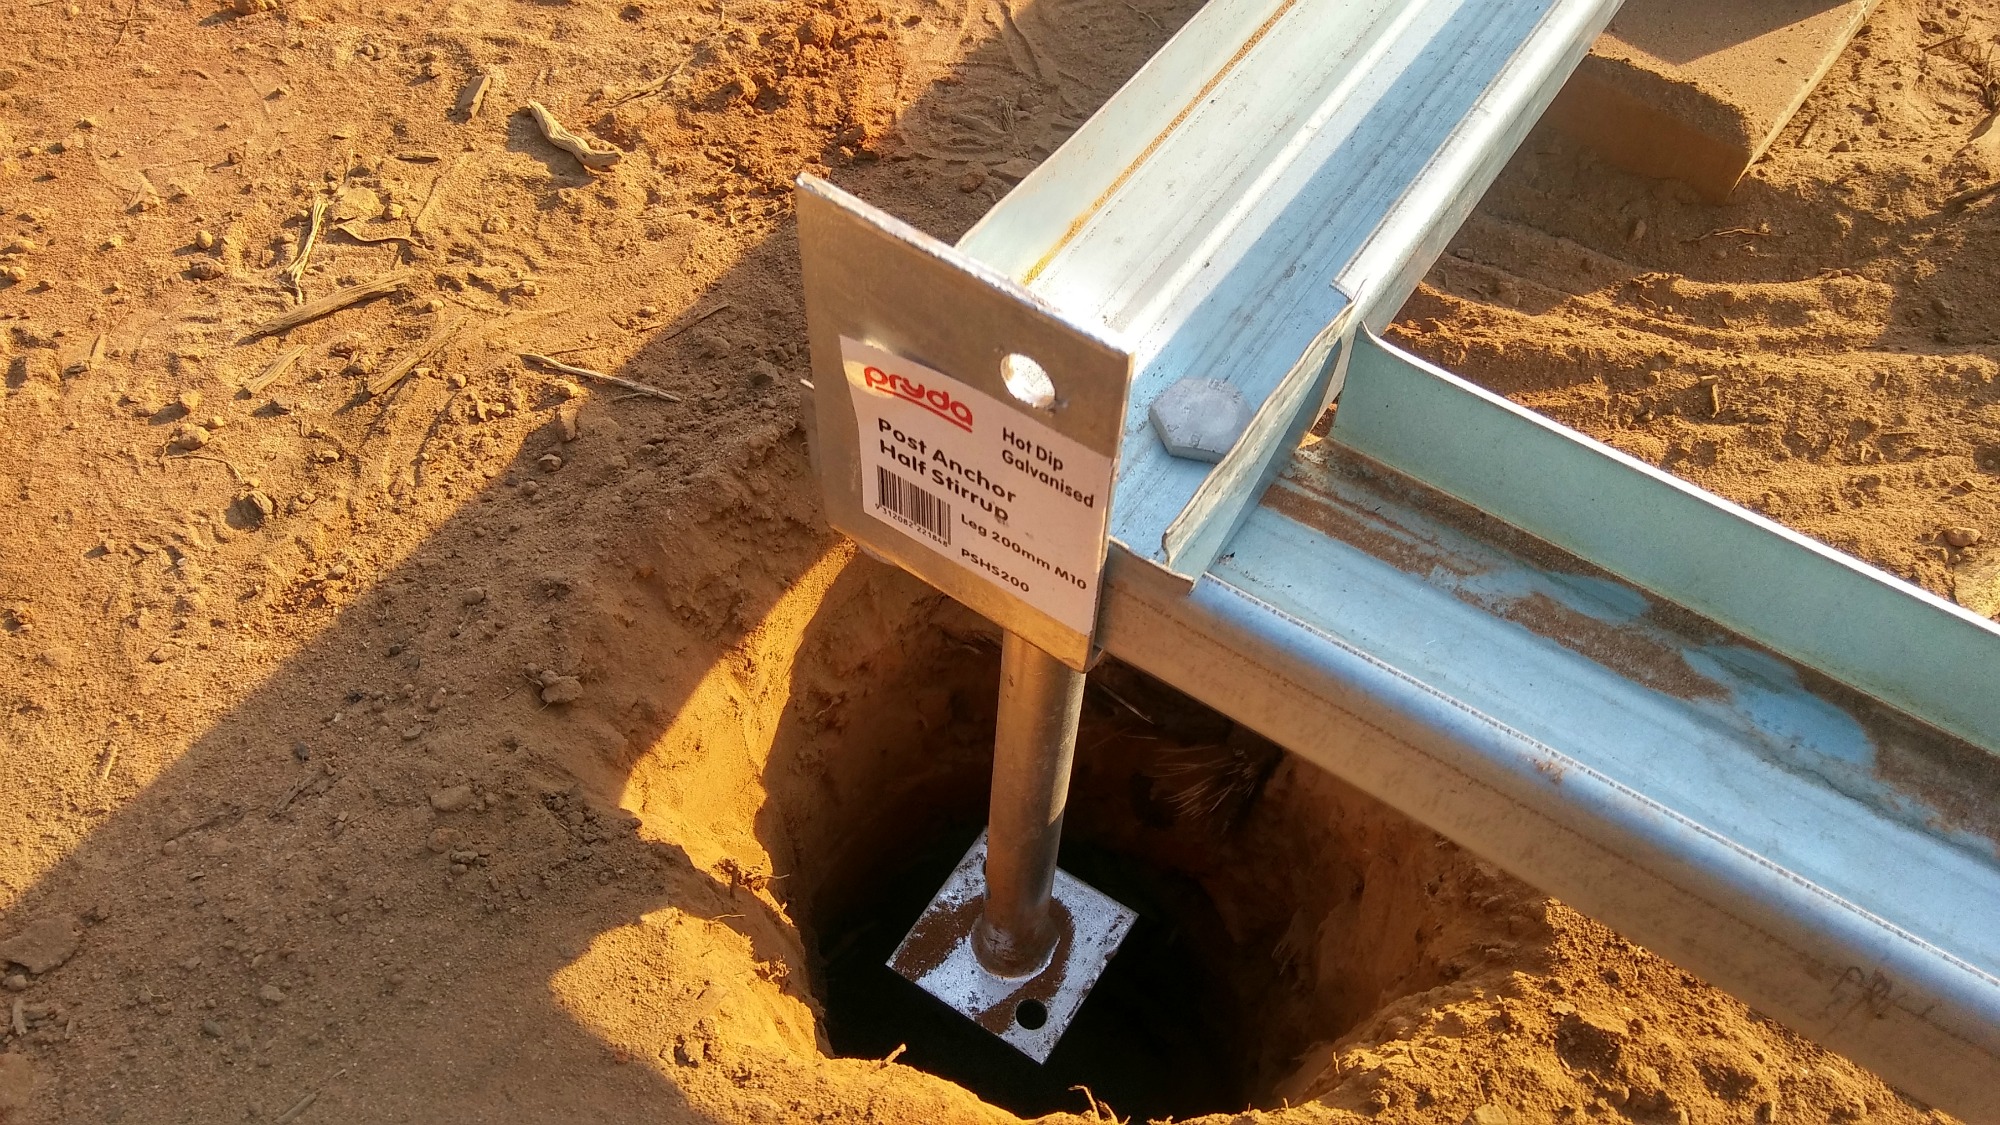
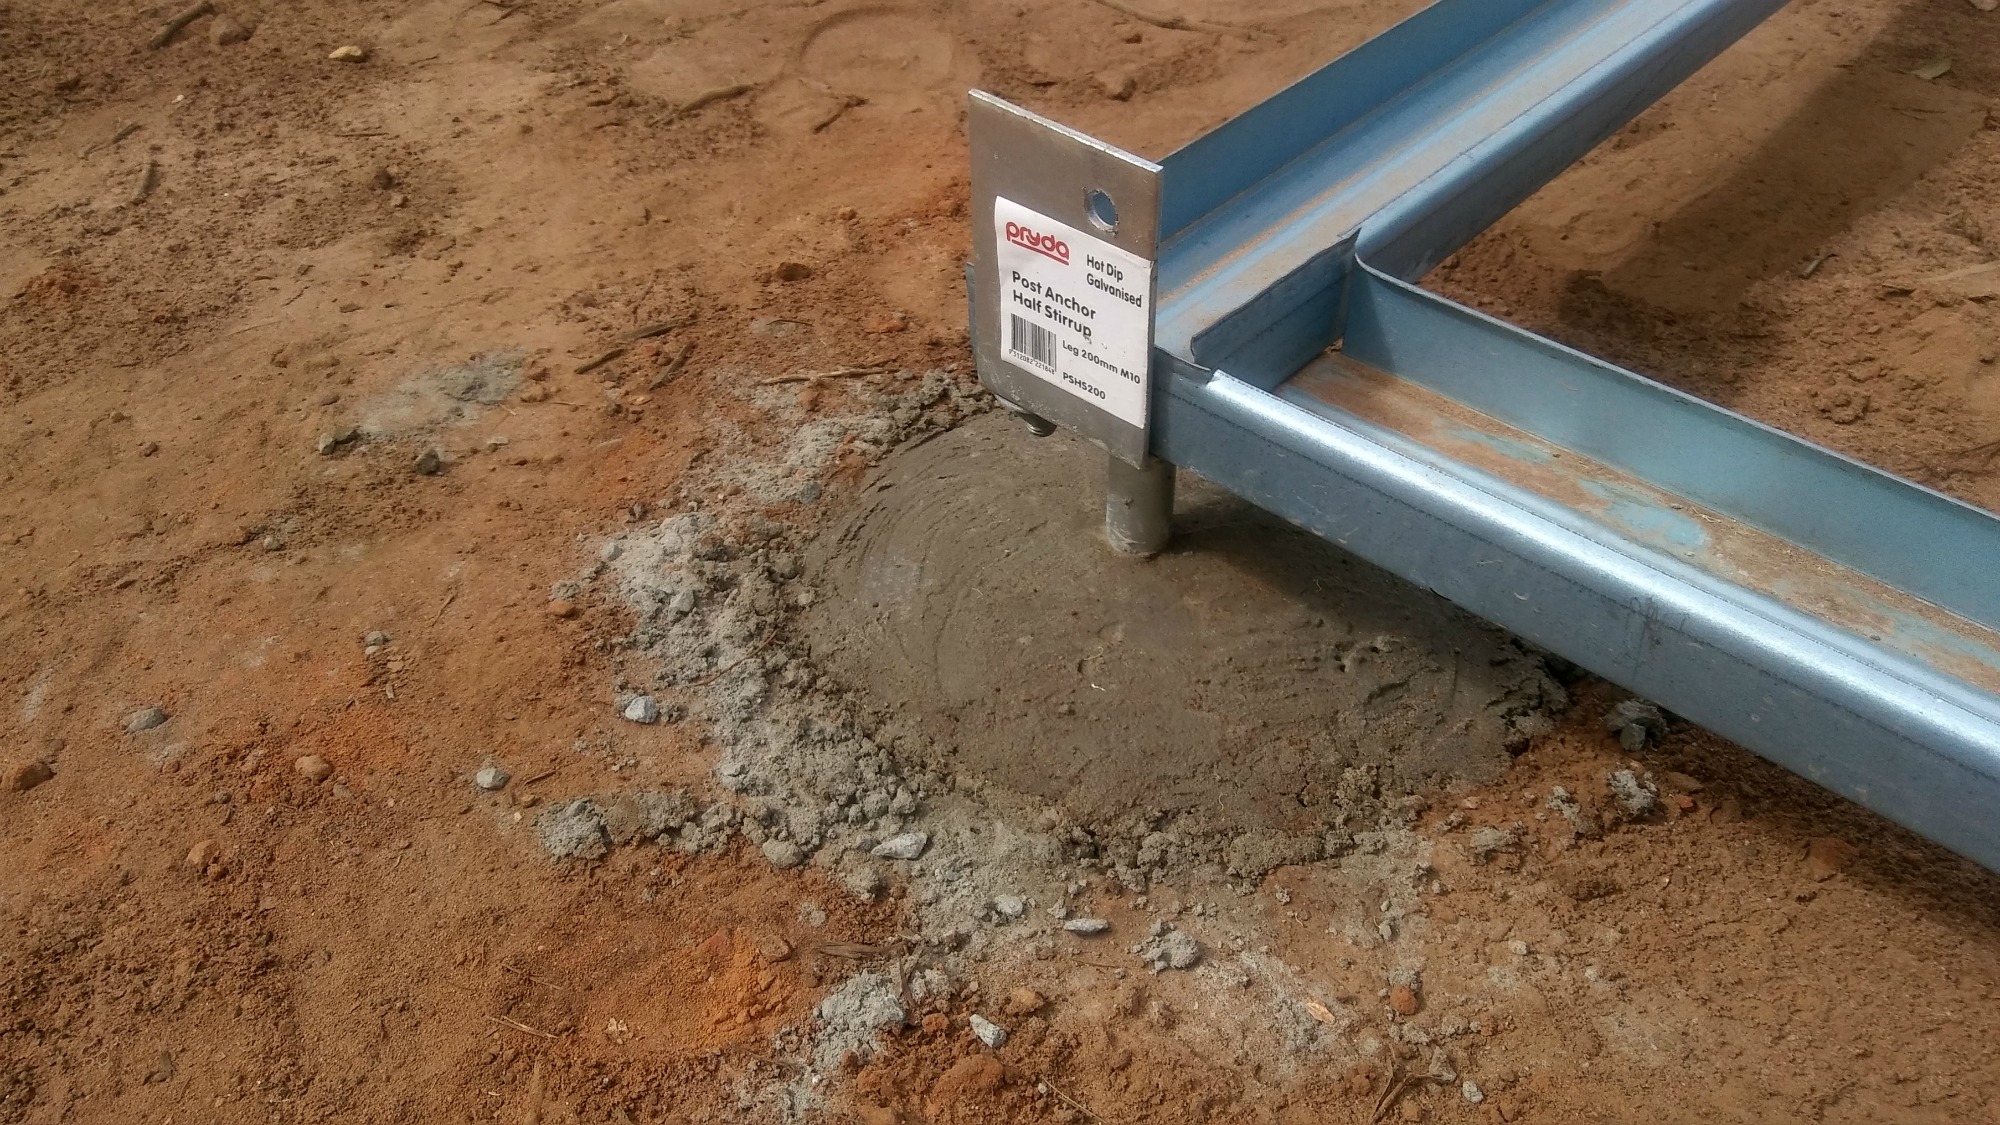
I then set out and marked my rectangle on the ground and dug four 700mm shed foundation holes: as it was a tall structure I didn't want it to uproot and roll down the hill in a storm. I placed the assembled frame and stirrups into the holes and propped up and leveled them with chocks.
When I was satisfied I mixed up some quick-dry concrete and set them in with a small dome on top to shed water. I later added six inner concrete supports to prop up the inner floor system. The rest of the floor had more steel studs topped with steel battens every 250mm.

Garden shed: framing walls
I assembled the wall frames using studs bolted to the stirrups as uprights, and also as noggin rails around the centre. That rail would serve as the fasten point of the blueboard edge, laid one on top of the other. Blueboard is supposed to be stood upright, but that didn't serve my purpose for this build. I then pre-made three trusses using a right angle triangular design with a centre king post.
One side was about 500mm longer to accommodate the intended wood shelter. I threw the first one up after securing a support batten to hold it in place as the roof framing was set up. I used lots of tech screws through the bottom chord to anchor it to the wall frames.

Garden shed: roof truss

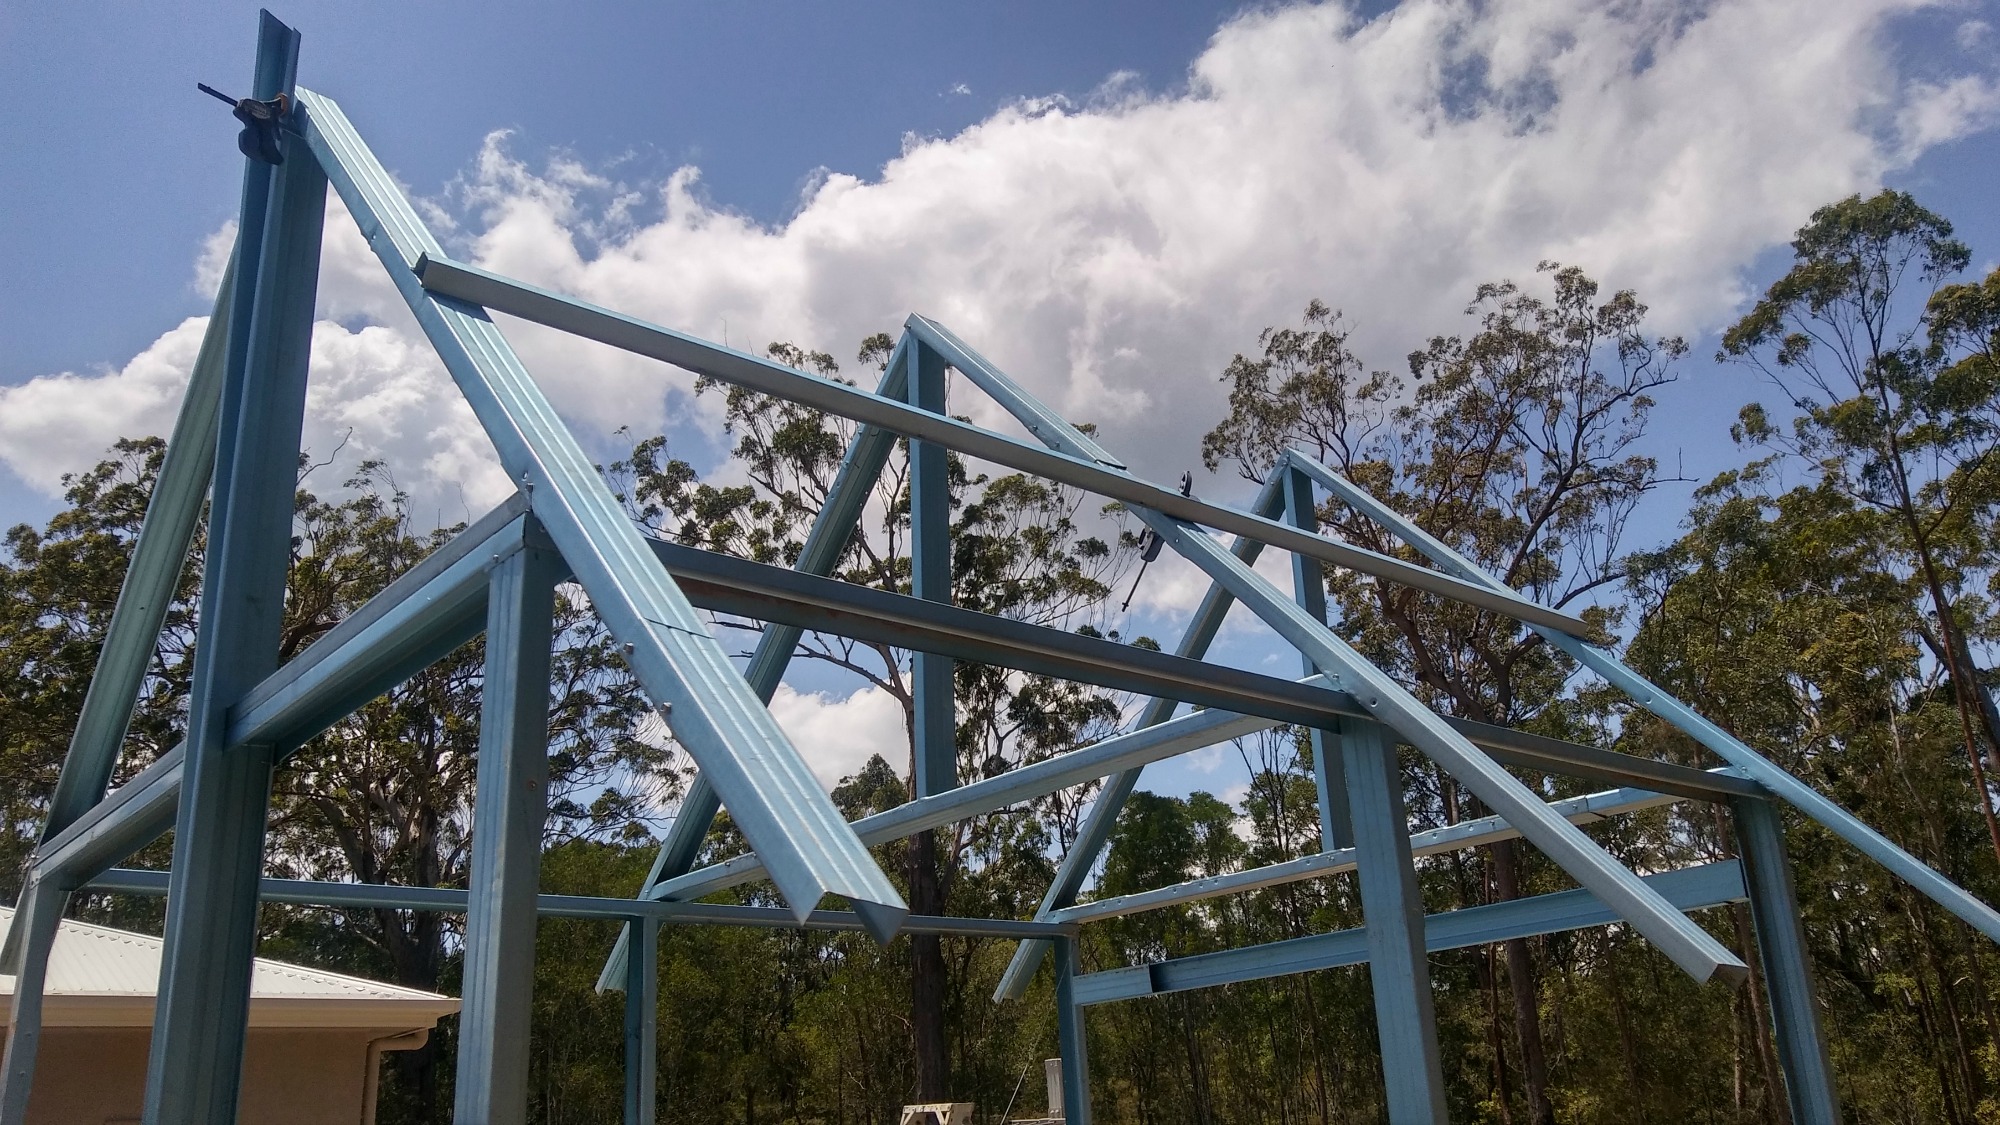
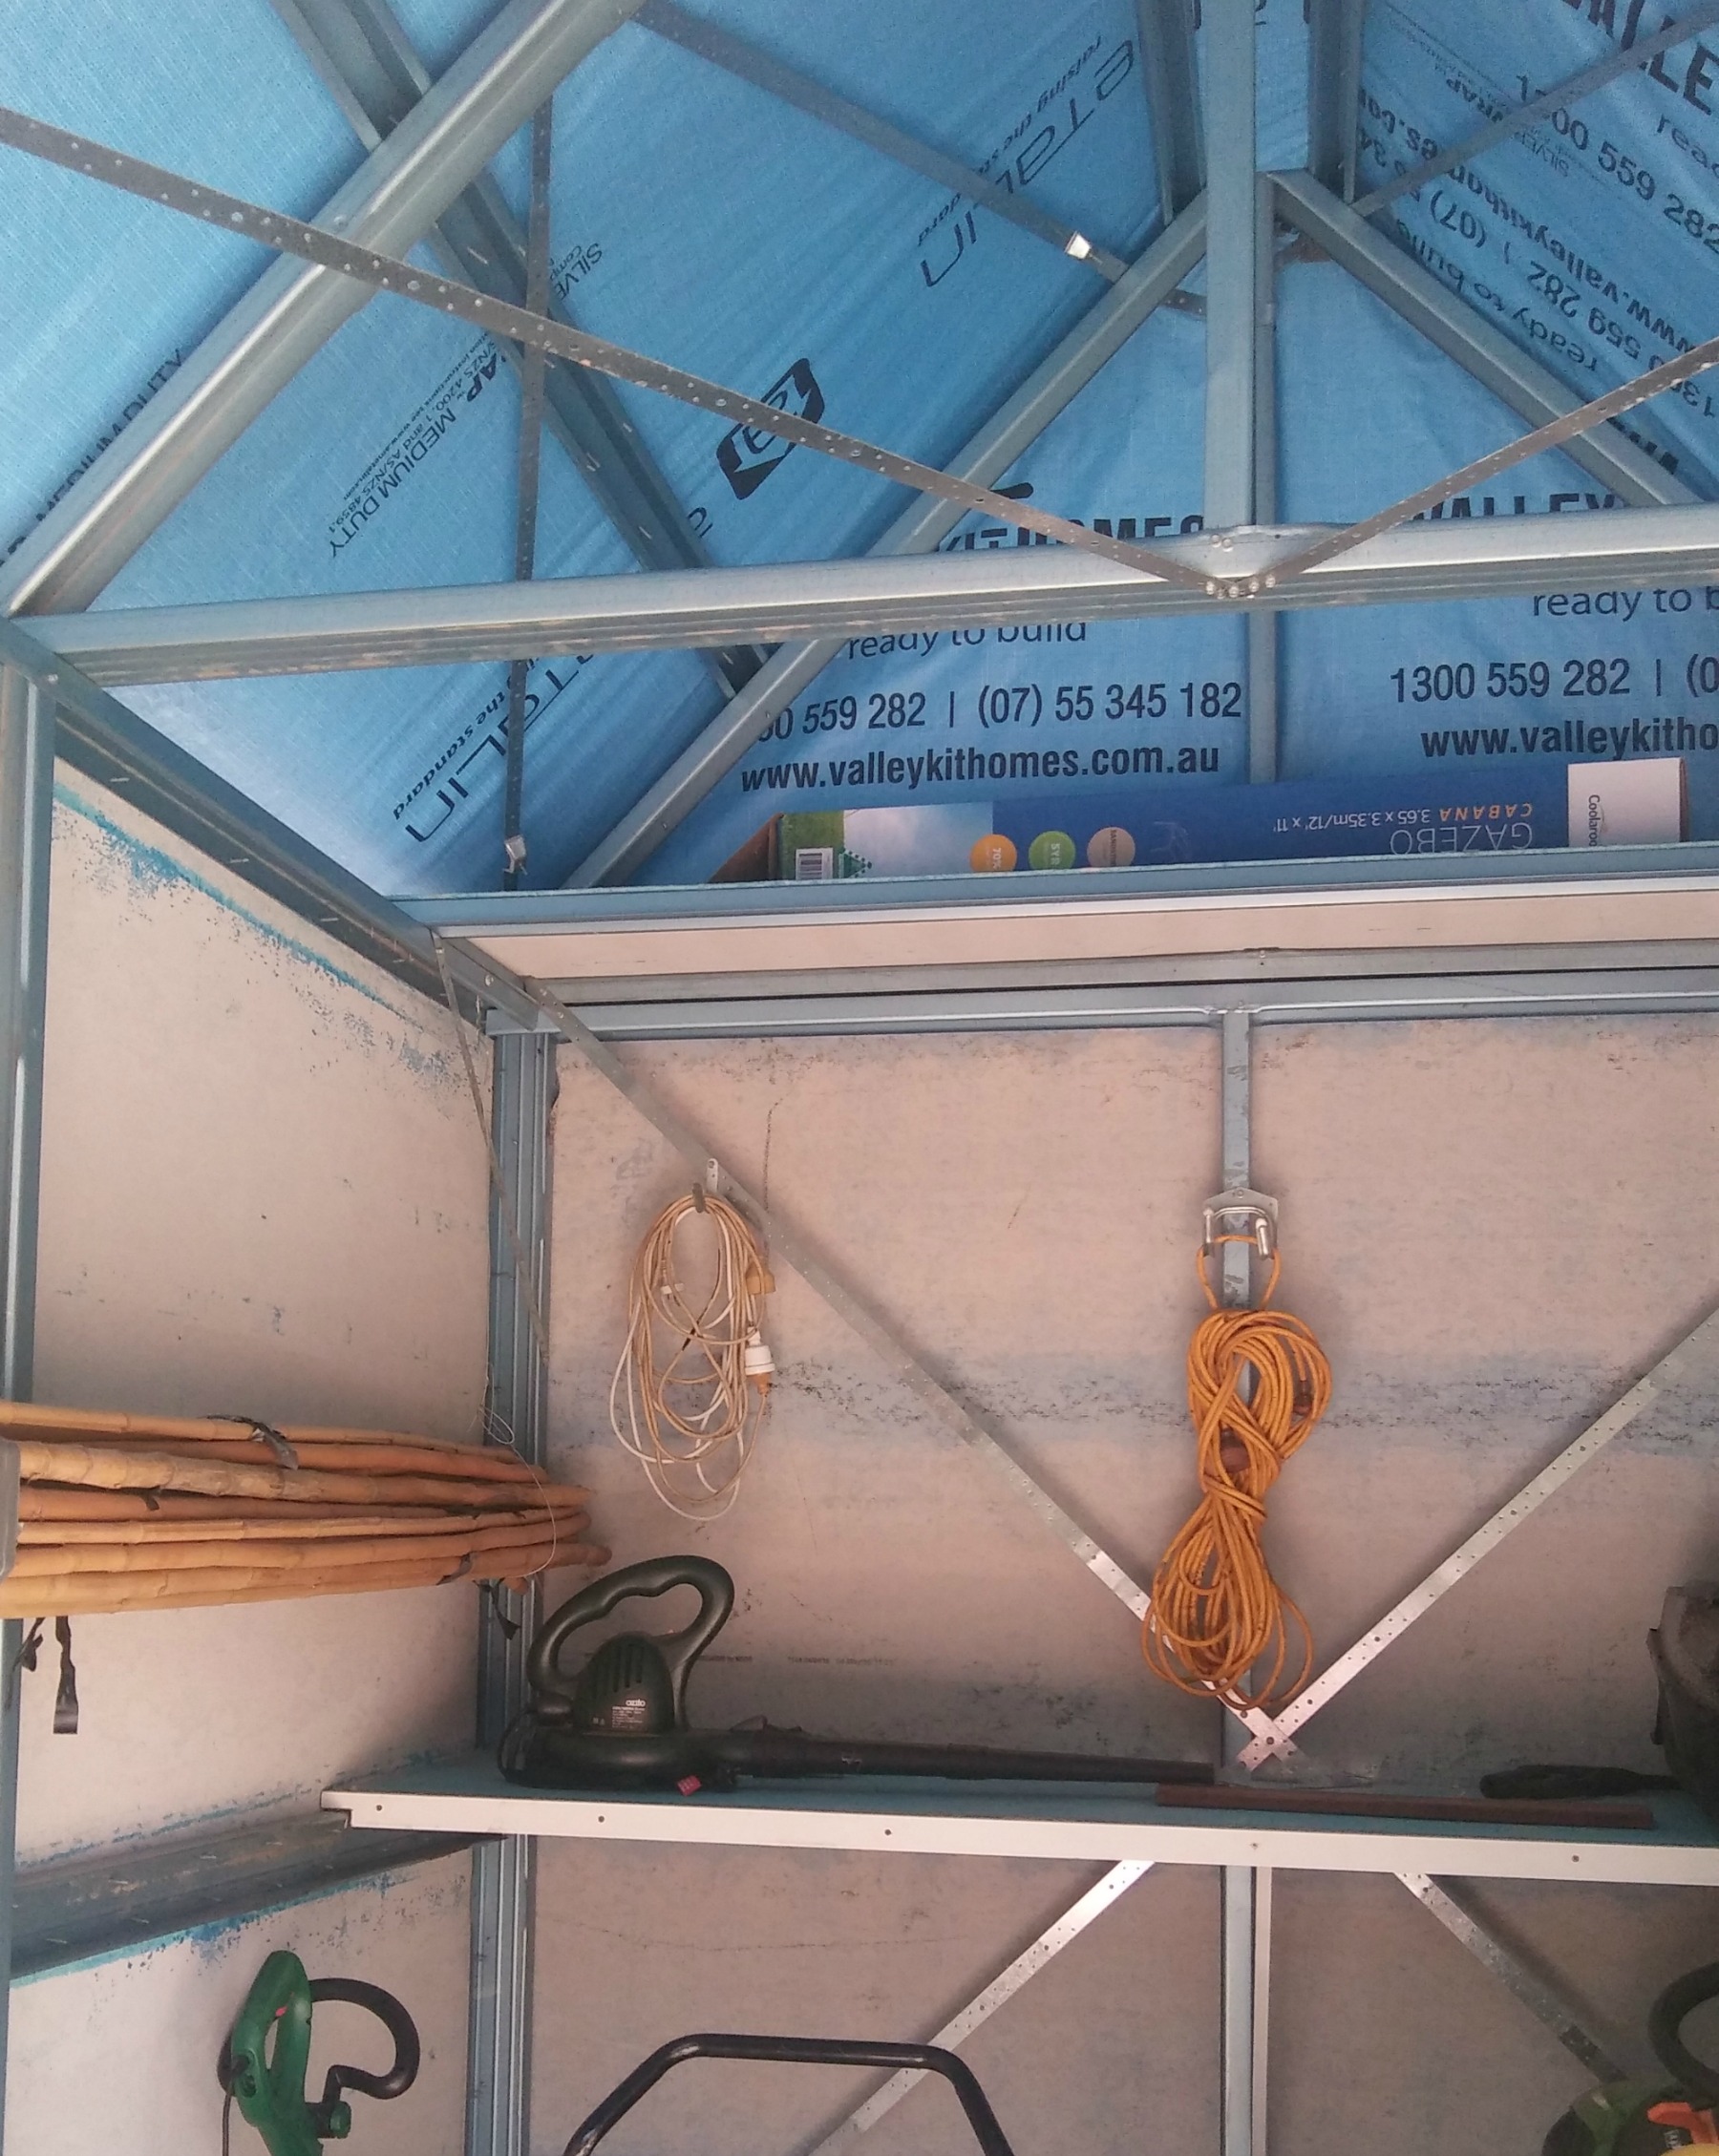
I then attached the roof battens across the trusses to hold them upright, the first at 100mm from the apex. After getting the spacing right, tech screws on either side of the batten secured them to the truss top chords. That was the framing done, next was the tie down and used normal roof truss bracing wiith steel strap over the trusses secured down the studs, and cross strapping to the rear wall. I also added a ceiling strap to the centre bottom chords and tensioned them all up with strap tensioners.
Next was the roof iron, but before that I threw up some house wrap over the structure to help with warding off condensation and give it some minor insulation. As I was not planning to work in the shed it didn't need proper insulation. I had five colorbond corro offcuts, but needed four more to cover the long side so I ordered them as well as four lengths of edge barge, a length of ridge cap and two lengths of guttering. The guttering came with two drop tubes and end caps.
Installing corrugated roofing is not rocket science, but if you start correctly and keep measuring towards the end of the job to keep it square, it usually works out. The base of the roofing should sit 50mm into the guttering. By rights, you should put up the guttering first, but I didn't.
Once the iron was on, my next step was the cladding. The blueboard was relatively easy: I just need to cut it to size, set up a level support, then fasten it with screws every 200mm on all studs and rails. I decided to use Hardie Primeline fibro cement weatherboards on the gable triangle at the top to break up the blueboard look a bit.
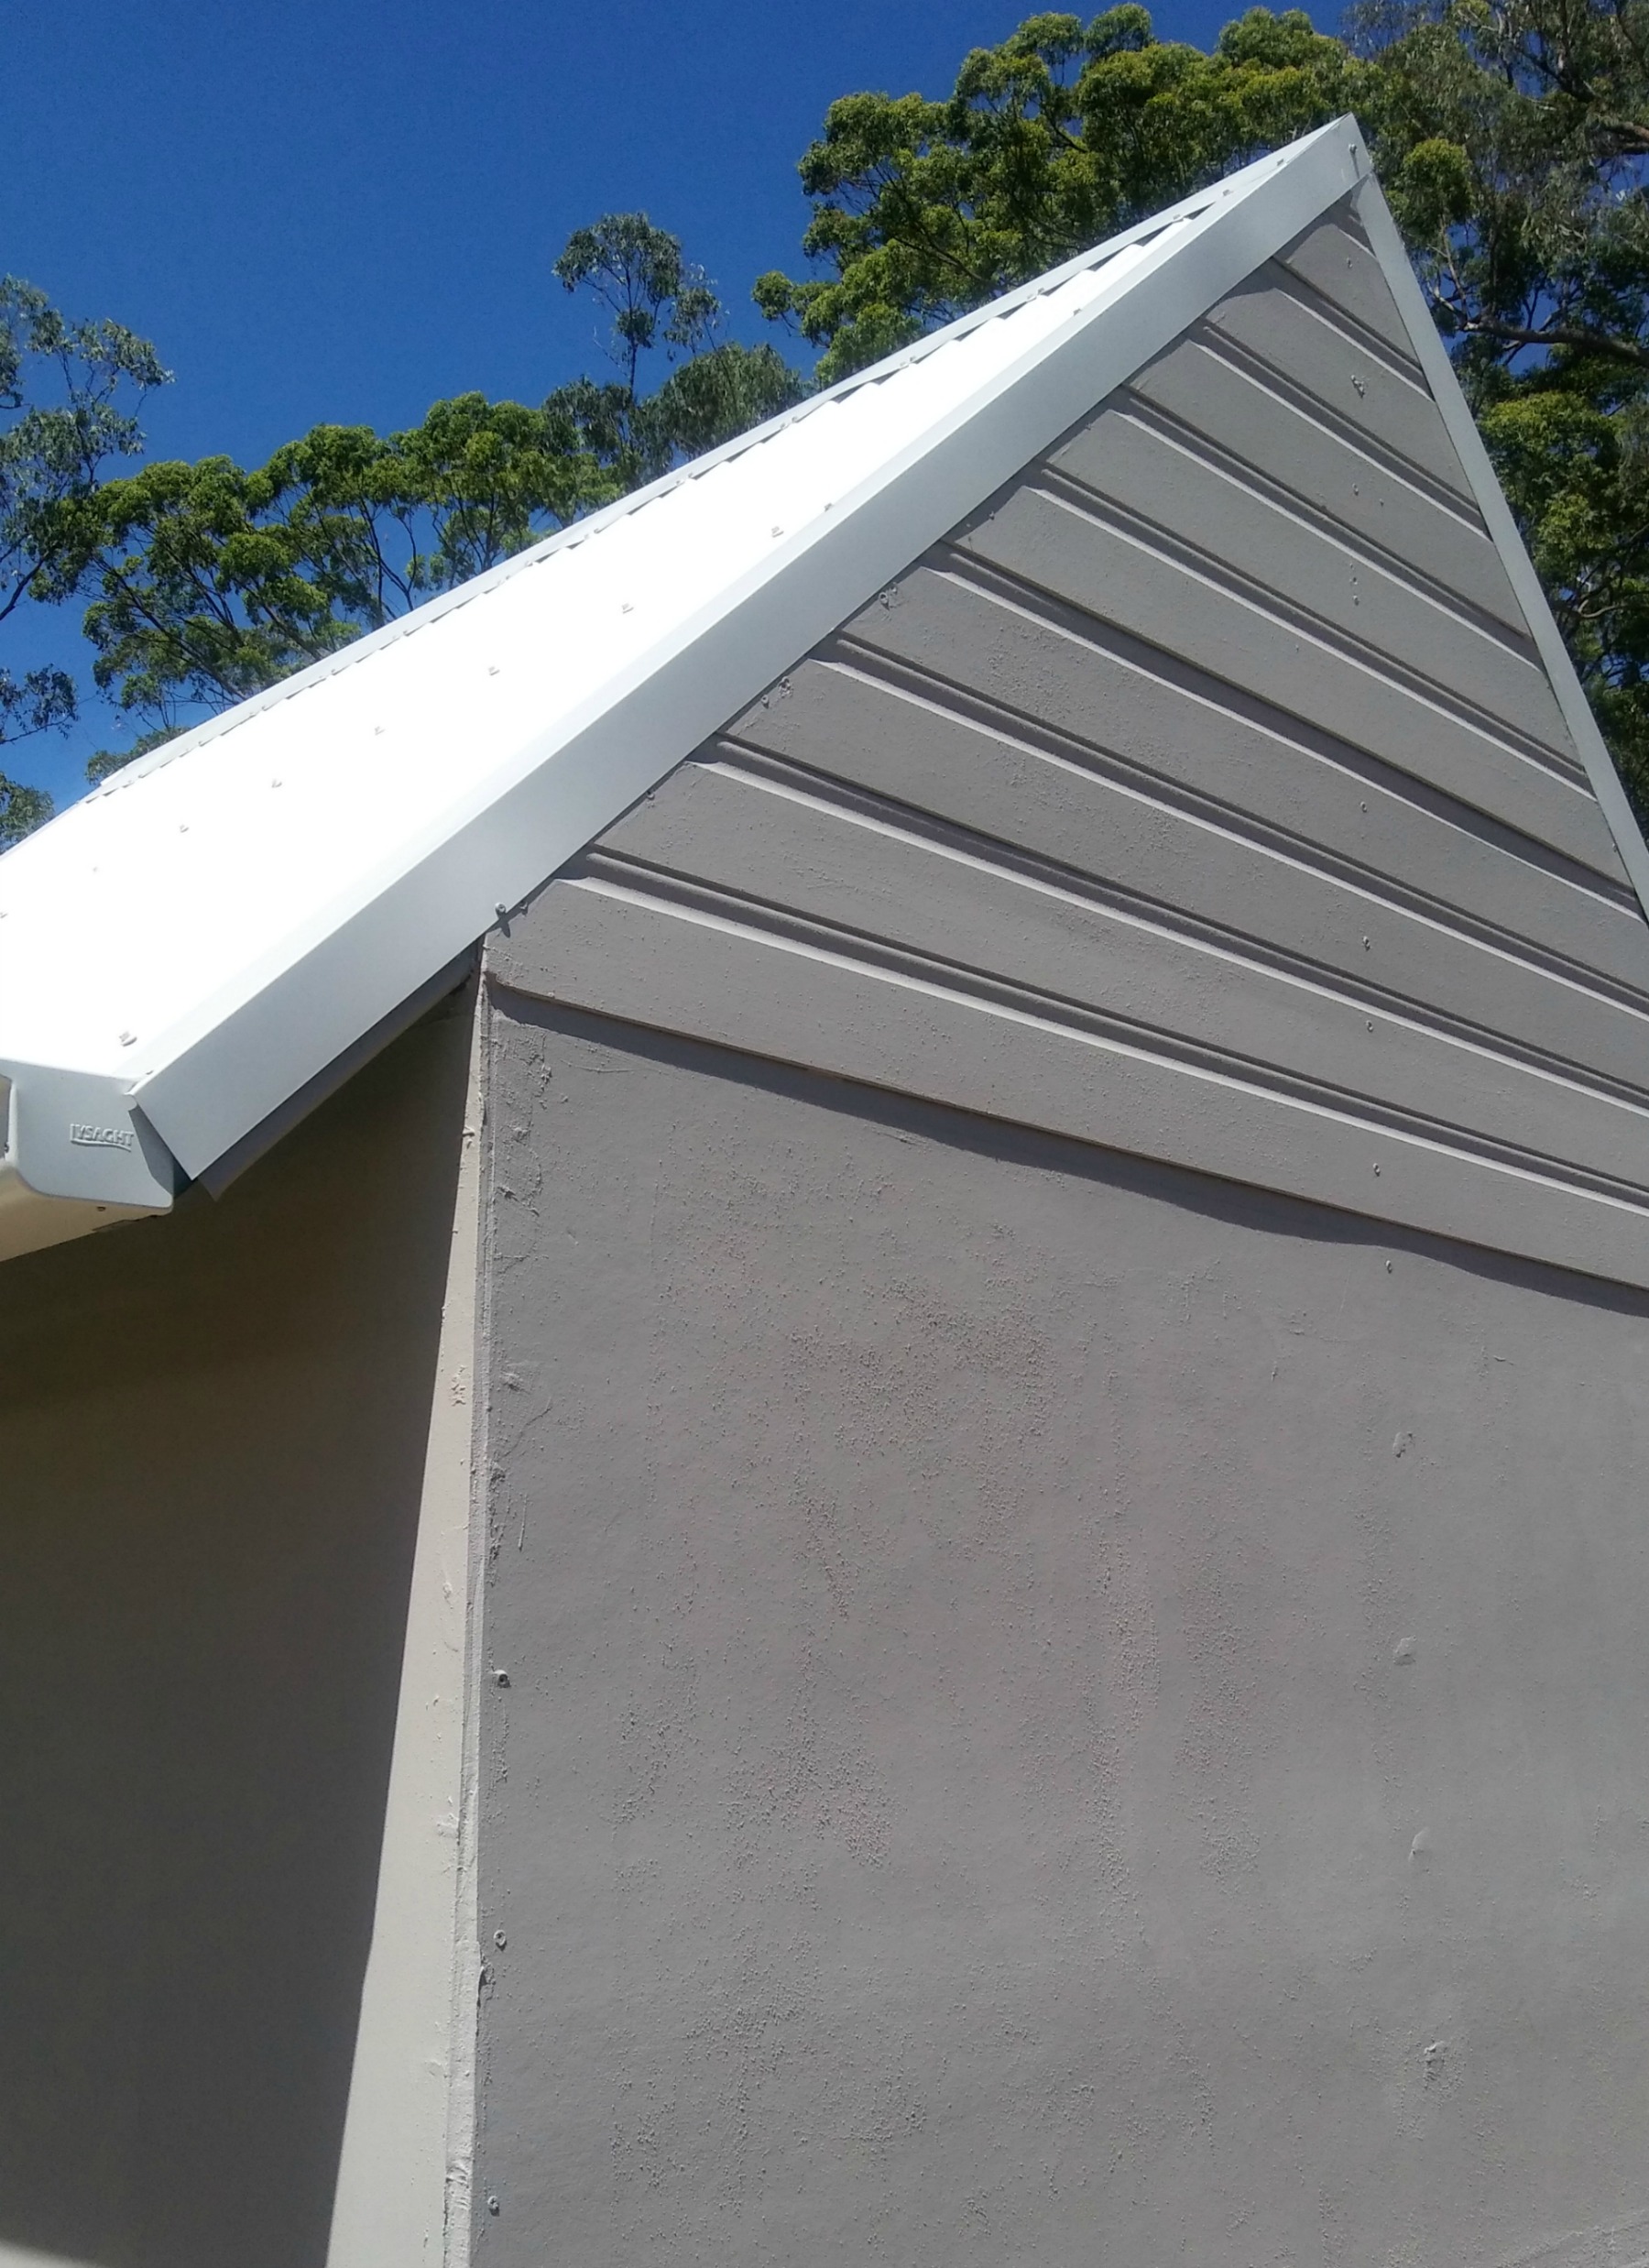
Next were the edge barges. I clamped them in place, measured and then cut them to fit, re-clamped and fastened them over the weatherboard edges. Finally, the ridge cap was carefully placed on top and fastened down over the barges.
There was lots of finishing work on this garden shed:
- applying jointing compound to the blueboard edges
- installing the guttering and downpipes
- framing up the door jambs and installing shed doors
- adding shelving
- painting
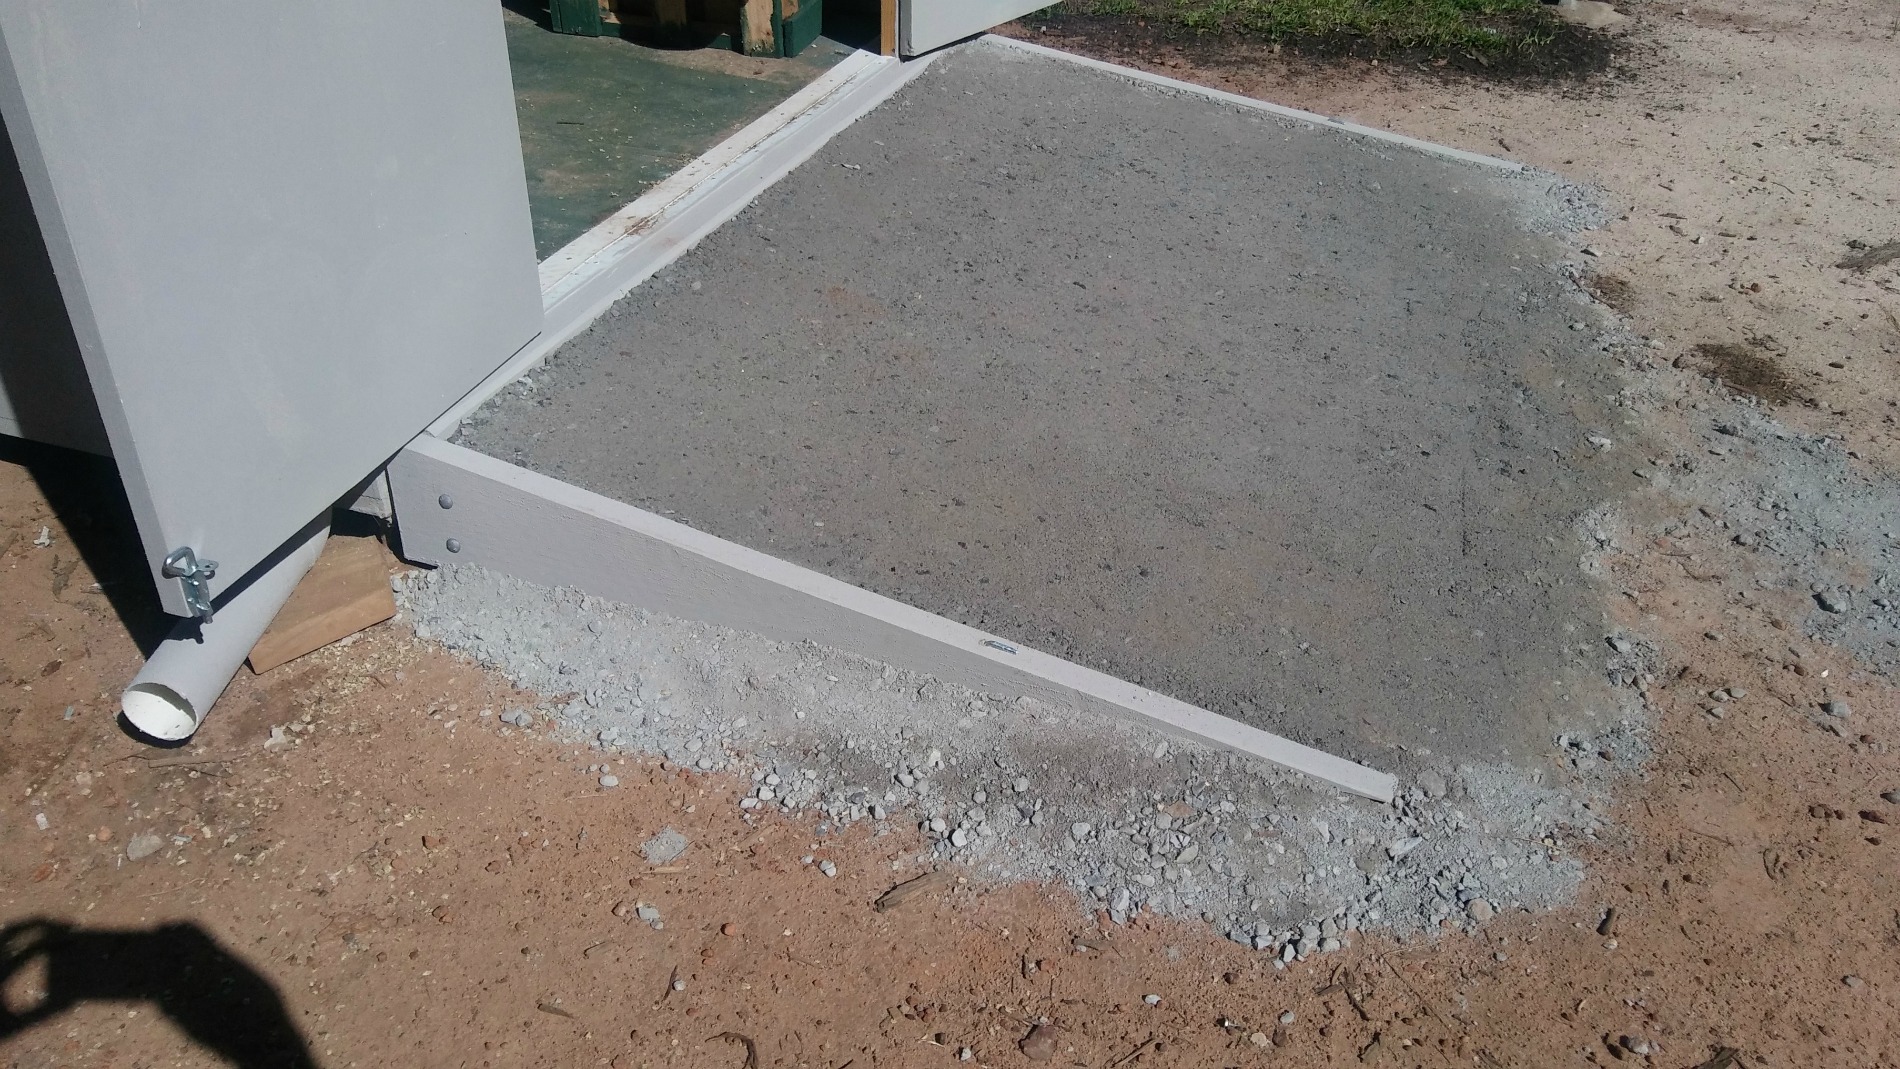
- adding flooring and a ramp
See my Wooden shed build here
Go back to my Projects page
Or return to Kithomebasics home.


