House Renovation
Before and After
My house renovation before and after, was absolutely not like it appears on our TV screens a couple of times a week. I took on a unique challenge when I bought this almost dead kit home in Gympie Queensland from a family who wanted to move into a shed!!! Now this was no easy DIY home improvement, weekend warrior action. This was a full time reno that took us four full months, and showed me how a deteriorated and unmaintained ugly duckling could be transformed into a shining star.
I've set up the graphics into 'before' and 'after' to show how dramatically the house interior and exterior was changed. My DIY home renovation ideas were pretty basic, but revolved around upgrading, renewing and or replacing. I painted, added under house 'skirts', replaced the shower, vanity and all flooring, and installed a flat-pack kitchen. I also replaced the drinking water tank, erected a carport and made numerous landscaping and gardening upgrades.
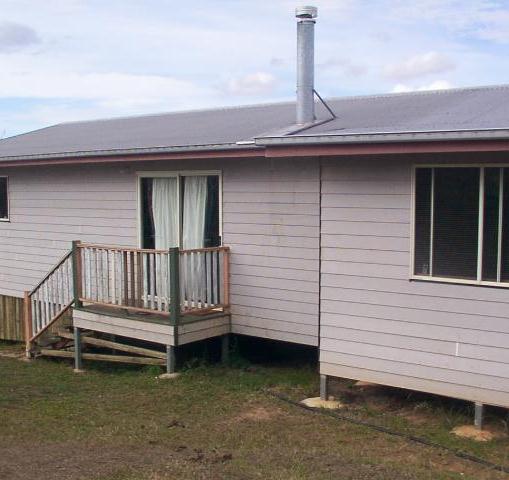
As far as Kit Homes go, this was a 2 bedroom basic design that had an extra bedroom extension. The exterior was pretty ugly fibrous cement cladding that had never been painted. It had dirt, mould and every spider nest imaginable.
So it needed a solid clean off, some hole sealing, the odd nail and some corner edging replaced. I needed to apply a sealing coat before a few coats of cream exterior gloss and dark green for the fascia and gutters.
I also added a simple pergola over the front entrance. Go to my DIY Pergola pages to help with design and construction.
I also installed paling under 'skirts' to cover up and dress up the exterior.

House renovation before and after
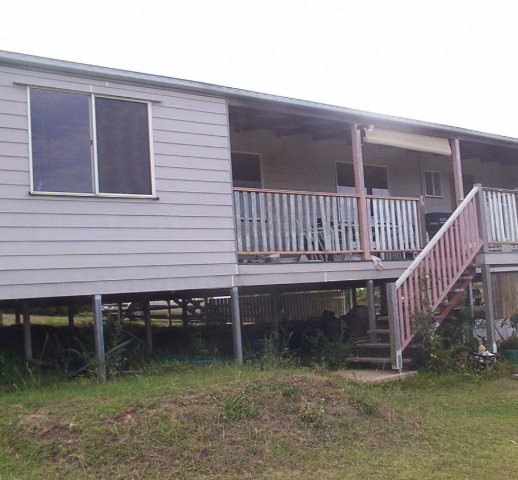
Around the back it was a disaster. This ugly duckling was showing its spots. Even the railings were raw..never painted, so were in major disrepair due to
water damage. A post had to be replaced and two downpipes. Some steel post stirrups had to be renovated (de-rusted and etch primed).
A lot of weeding and ground dirt removal was required to help with the skirt placement.
Many palings needed to be replaced and a few step treads.
I threw away the blind and installed the longer 'skirts' under the
bearers. I also installed a better set of gates to the rear under storage area.
Complete cleaning, sealing and two coats of paint went on the walls, fascias, gutters, verandah palings, skirts and stairs.

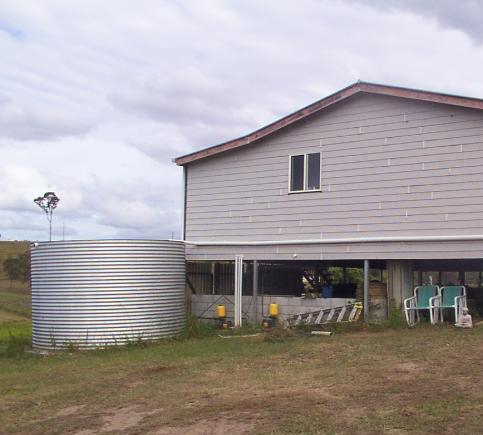
The end wall was on show to the world, but was basically very boring. The steel tank had numerous rust holes in it and needed replacing as did the water pump.
The installed paling skirts along the side improved the look no end, mostly by hiding the storage area. I later painted them dark green.
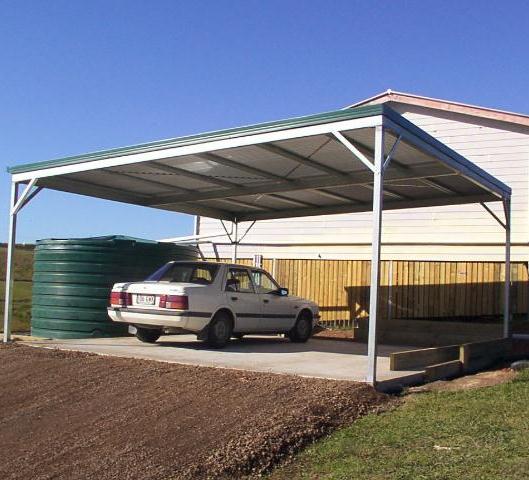
The second 'after' pic also shows the newly installed two bay carport over a 6 x 6 metre concrete pad with a newly laid road-base driveway.
I had the old steel tank removed and installed 'Poly' water-tank, which I laid on a raised and firmed off pad. I rearranged the downpipes and installed a new water-pump.
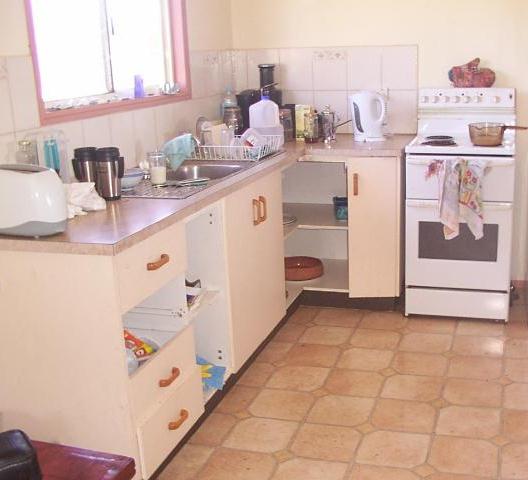
The kitchen, well it was another disaster. First problem was we had no water-remember the pump had died and the tank was leaking.
The existing kitchen cabinets had been abused and neglected by three renegade kids, had two missing doors and a missing drawer.
The window reveal was still the original pink seal colour you get when they are installed before painting. Flooring was very old and worn vinyl.
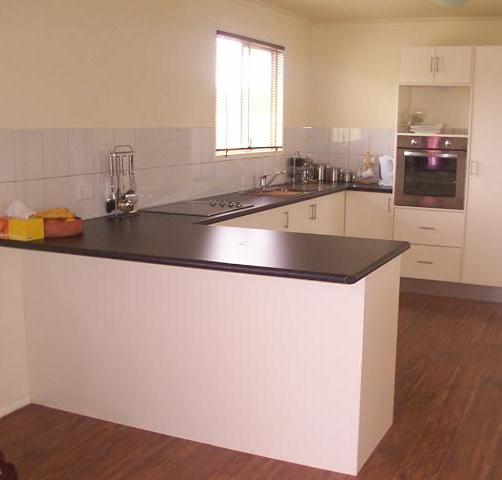
After throwing the kitchen carcasses in the skip bin, I installed the flatpack kitchen. It was a slow, but enjoyable experience and looked about 1000% better than the original could ever look. Go to my Installing Kitchen Cabinets pages for a break down on flatpack instalation.
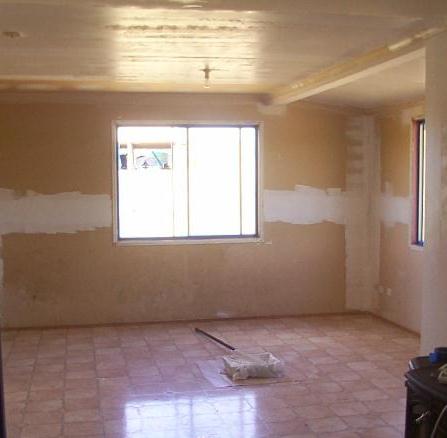
Next stop was the living rooms. This was a very long room that included the kitchen, dining and lounge rooms along the western side of the house.
The first pic shows how we bought it. The jointing plaster still unpainted and no light battens or curtains. And of course the ugly vinyl floor.
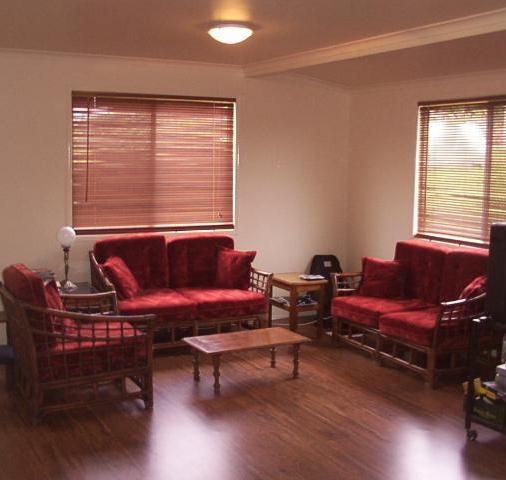
We attacked the walls first: resanding the plaster joins and sealing up the walls with good primer paint. Then a couple of coats of interior flat paint.
We ripped up the flooring and had a vinyl installer lay some modern 'wood' style vinyl flooring. We installed new lights and timber Venetians, fixed the fireplace and painted the doors and bedrooms.
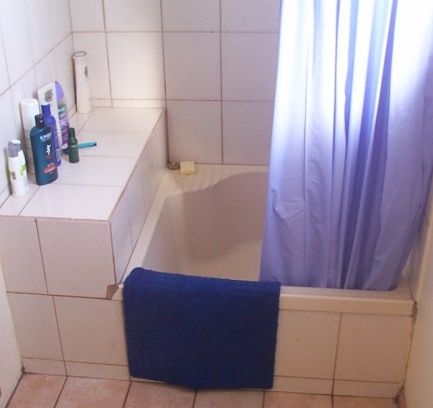
The bathroom was a real dilemma. It was only 3 metres by 1 metre, contained a decrepit mini bath with overhead shower that seemed to have been tiled in the dark.
The bath leaked and there was resulting damaged floor boards. The taps and shower heads were rusty so the lot had to go. It was very satisfying demolishing this area!!
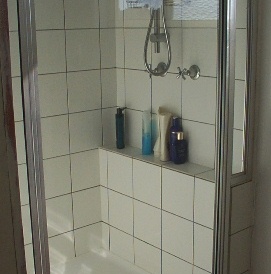
I started with a quick floorboard repair and wet seal. Then dropped in a ceramic 1000x1000 shower base. I then constructed a 'hob' to put the shampoo in, and I was ready to tile.
I chose a white 250x250 with black caps at the top. I also purchased combination mixer, shower lead and head and soap holder. A glass and aluminum man installed the framed shower screen.
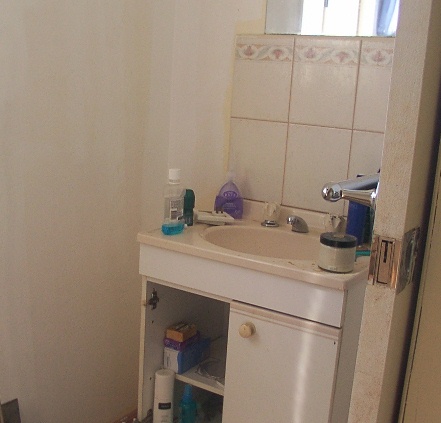
On the other side was a broken vanity that had a missing door, stained sink and broken mirror above.
I proceeded to rip it out, thankfully it had a convenient tap below the floor to turn off the water. The hardest part was the mirror which was of course glued to the wall.
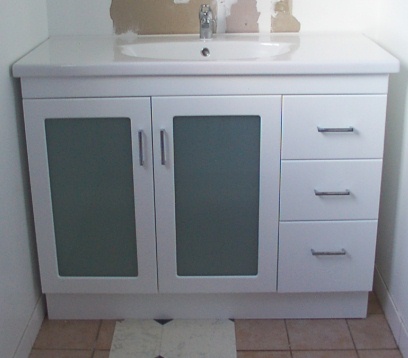
I did some DIY plumbing and positioned the lovely new two door cabinet vanity into place over the pipes.
I installed the taps and waste earlier and siliconed it in. I then set and glued up a new mirror, tiled in a splash back and had a new light /exhaust fan /heater installed.
Lastly a wet area vinyl was laid to finish it off. And of course a anti-mould paint.
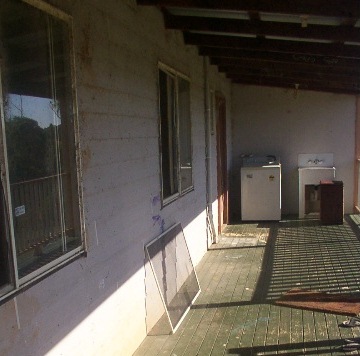
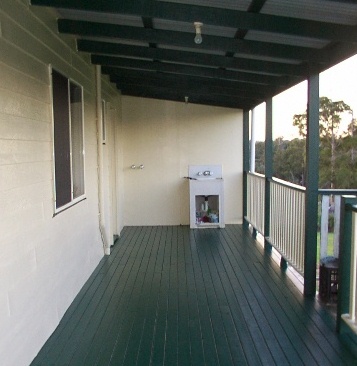
The verandah was a disgrace. Cobwebs, broken screens, no lights, old or no paint, dirty and rusted windows, and the rotted railings mentioned before. Also a broken laundry tub at the end.
We hosed the place off, fixed the windows and screens, painted the rafters dark green, primed and painted the cladding, sanded and painted the flooring and fixed and painted the verandah palings. We also replaced the laundry tub.
This ugly duckling home was every buyers nightmare but the house renovation before and after result was a very livable house.
Return to DIY Projects
or Kithomebasics home page


